Acronis
Acronis is a backup and recovery solution that can integrate with Akave storage for secure data protection.
Prerequisites
- Acronis Account
- If you do not already have an Acronis account, please create one at Acronis
- Akave Cloud Credentials
- If you do not already have these, please create them on Akave Cloud
- AWS Account (for Backup Gateway option)
- User must have access to the AWS Marketplace and EC2, sign up at aws.amazon.com
Acronis Setup
To get started with Akave and Acronis, make sure you have access to your Akave:
- Access Key ID
- Secret Access Key
- Endpoint URL
As well as a bucket in Akave to store your data. More information on how to create a bucket can be found in the Bucket Management section of these docs.
Akave O3 can be used with Acronis in two common ways:
- Acronis Cyber Protect Cloud: Configure an S3-compatible backup location directly in the Acronis SaaS console.
- Acronis Cyber Infrastructure (Backup Gateway): Run an Acronis-managed gateway (for example via AWS Marketplace) that exposes S3-compatible storage configuration through a self-managed service.
In both cases, you’ll use your Akave S3-compatible credentials (access key, secret key, and endpoint) and an Akave bucket. If you need to validate your Akave bucket and credentials first, reference the other S3-compatible integrations in this folder (for example Snowflake and S3FS).
Acronis Cyber Protect Cloud
This option is best when you want the simplest setup and prefer a fully managed Acronis control plane.
- Create an account for Acronis Cyber Protect.
- Use the Acronis console to set up a Management Agent on the device you want to back up by going to Devices → Add then select the device you want to backup from and follow the installation instructions provided.


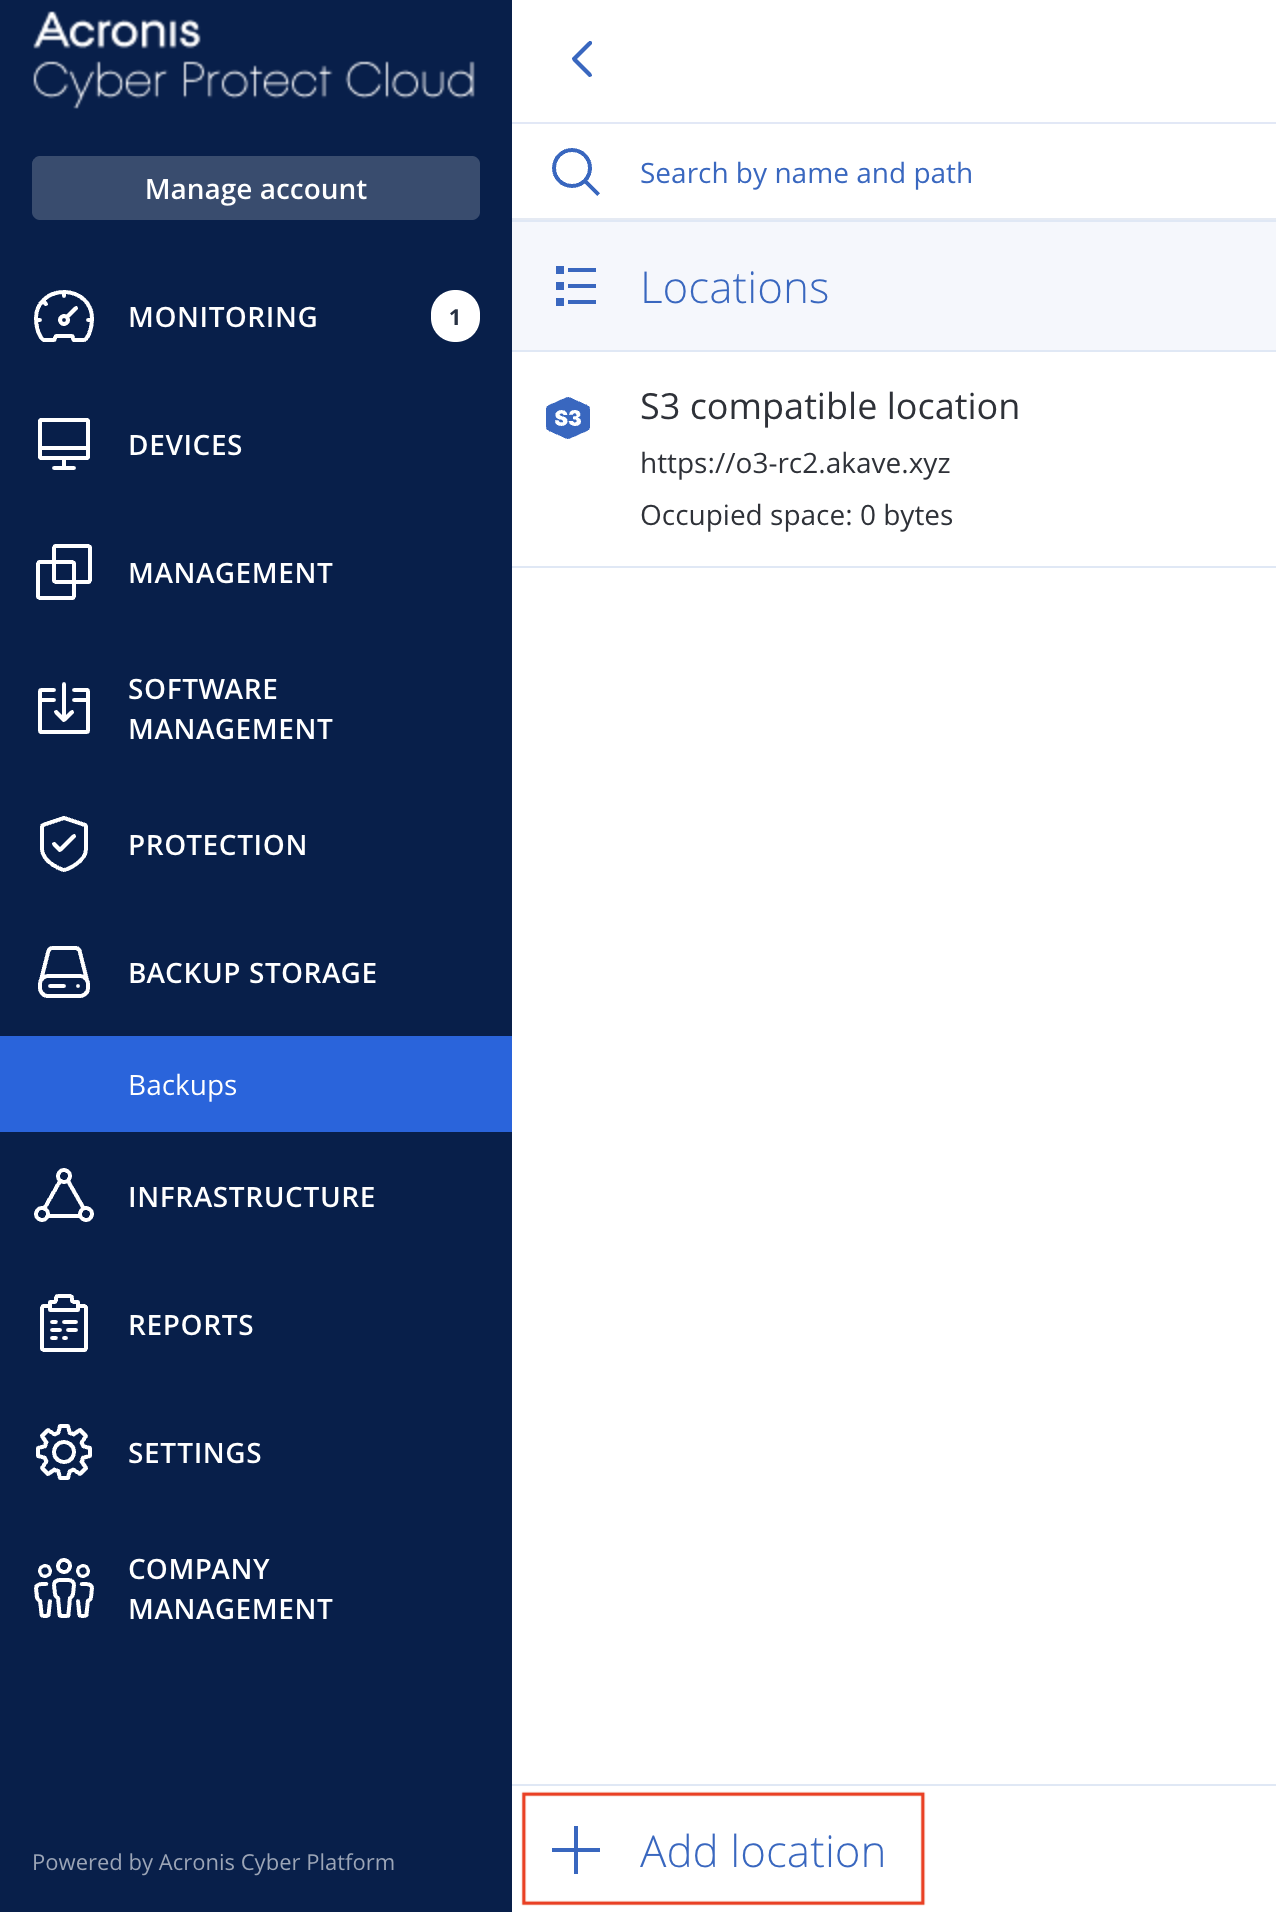
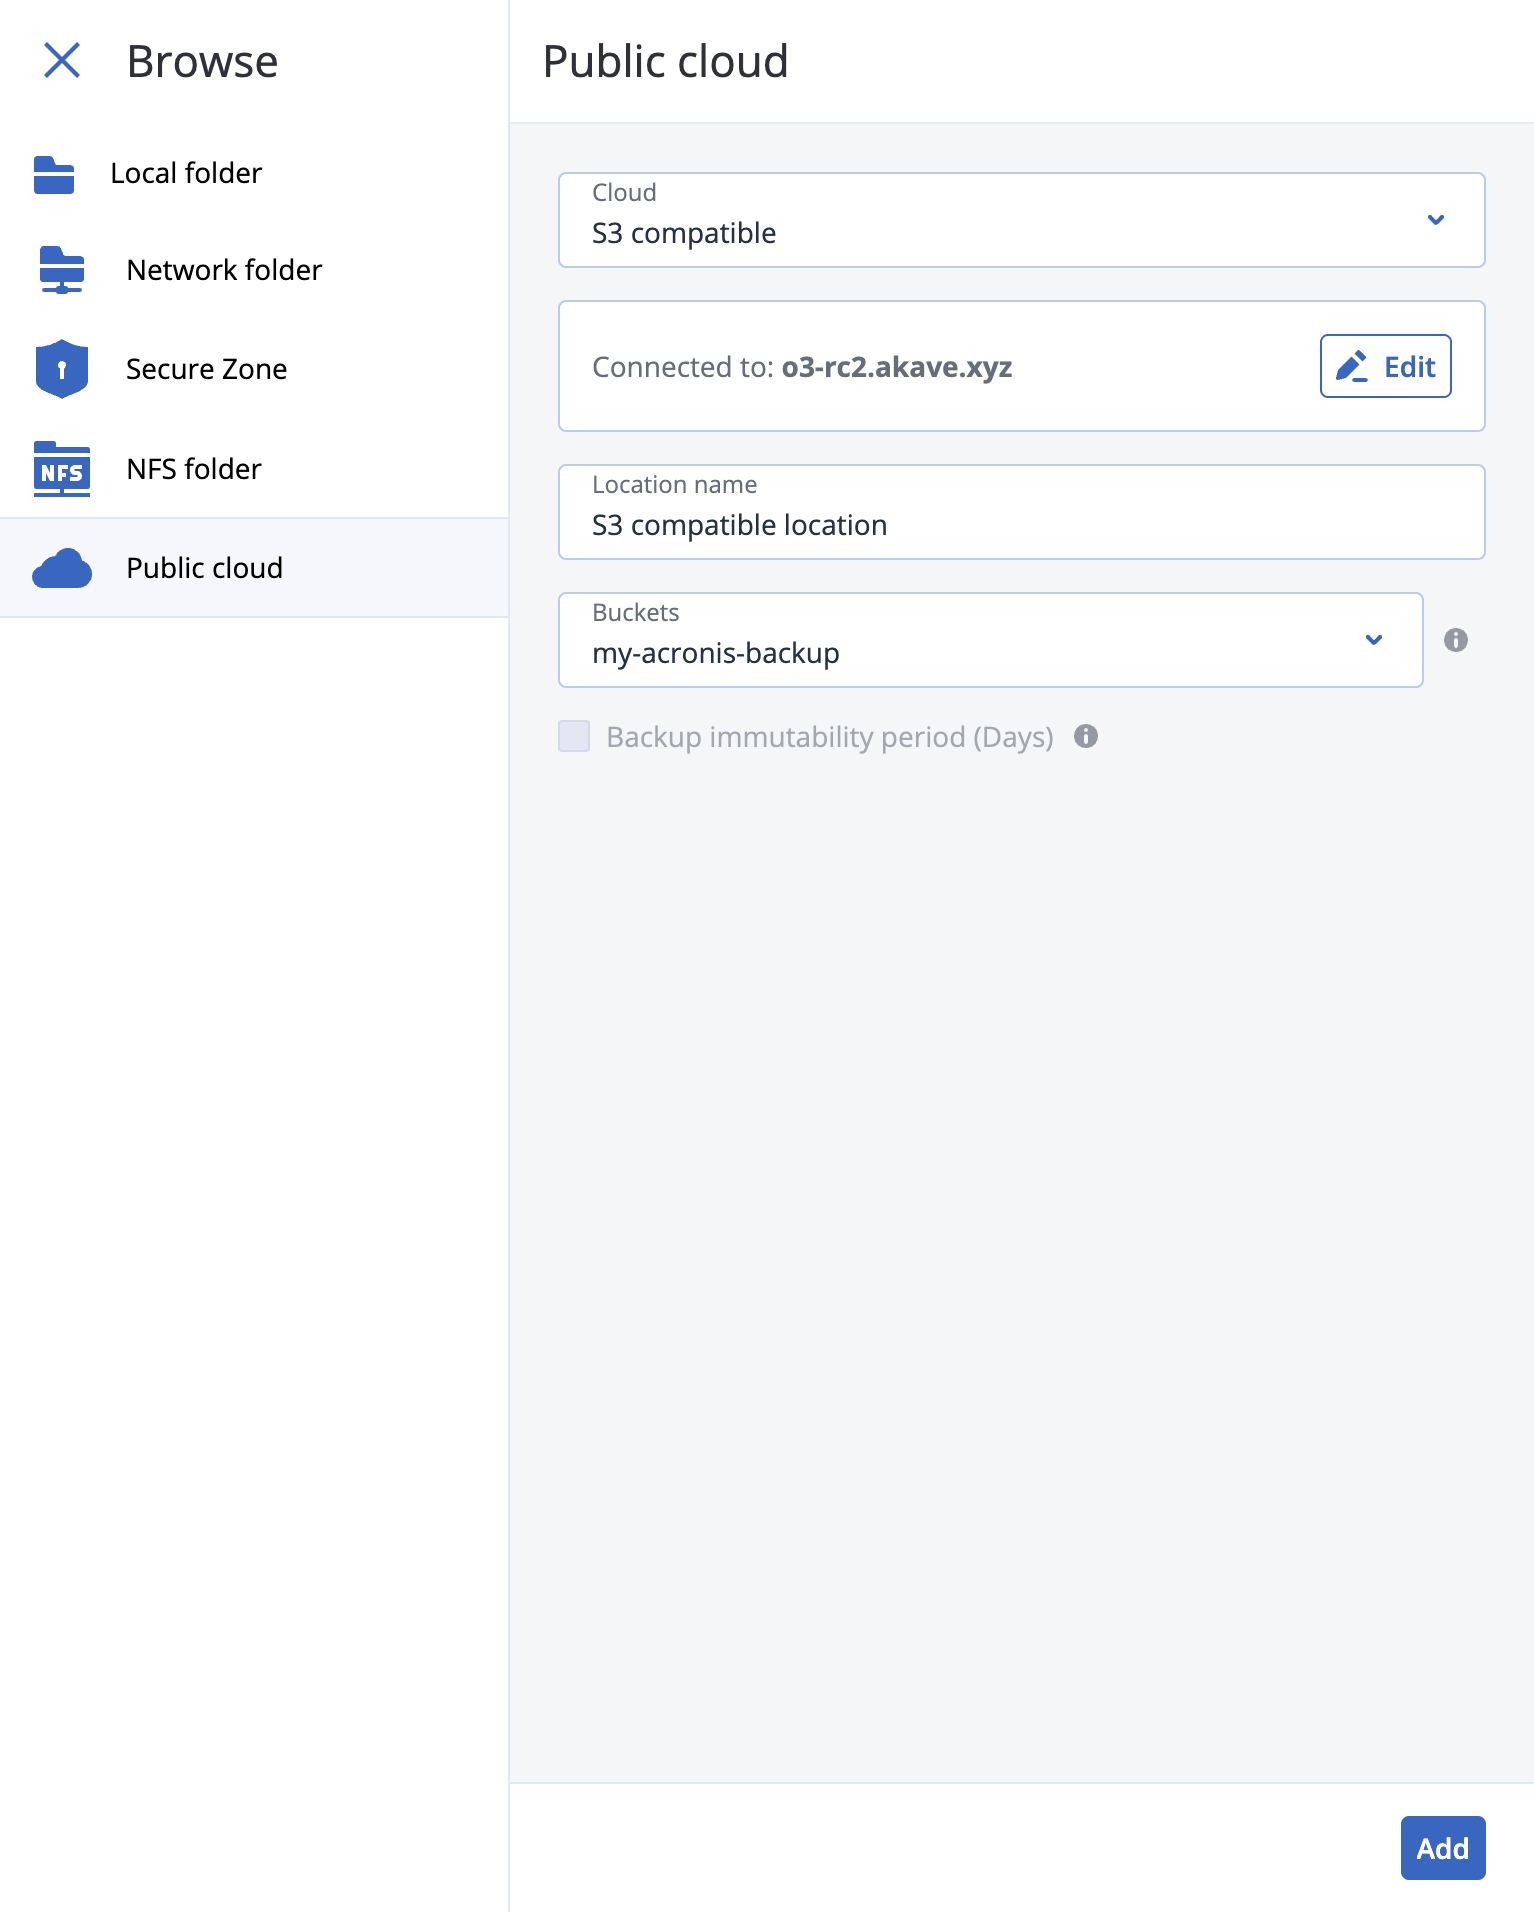
- In the Acronis console, add Akave as an S3-compatible backup location:
- Go to Backup Storage → Backups → Locations → Add location → Public Cloud → S3 Compatible
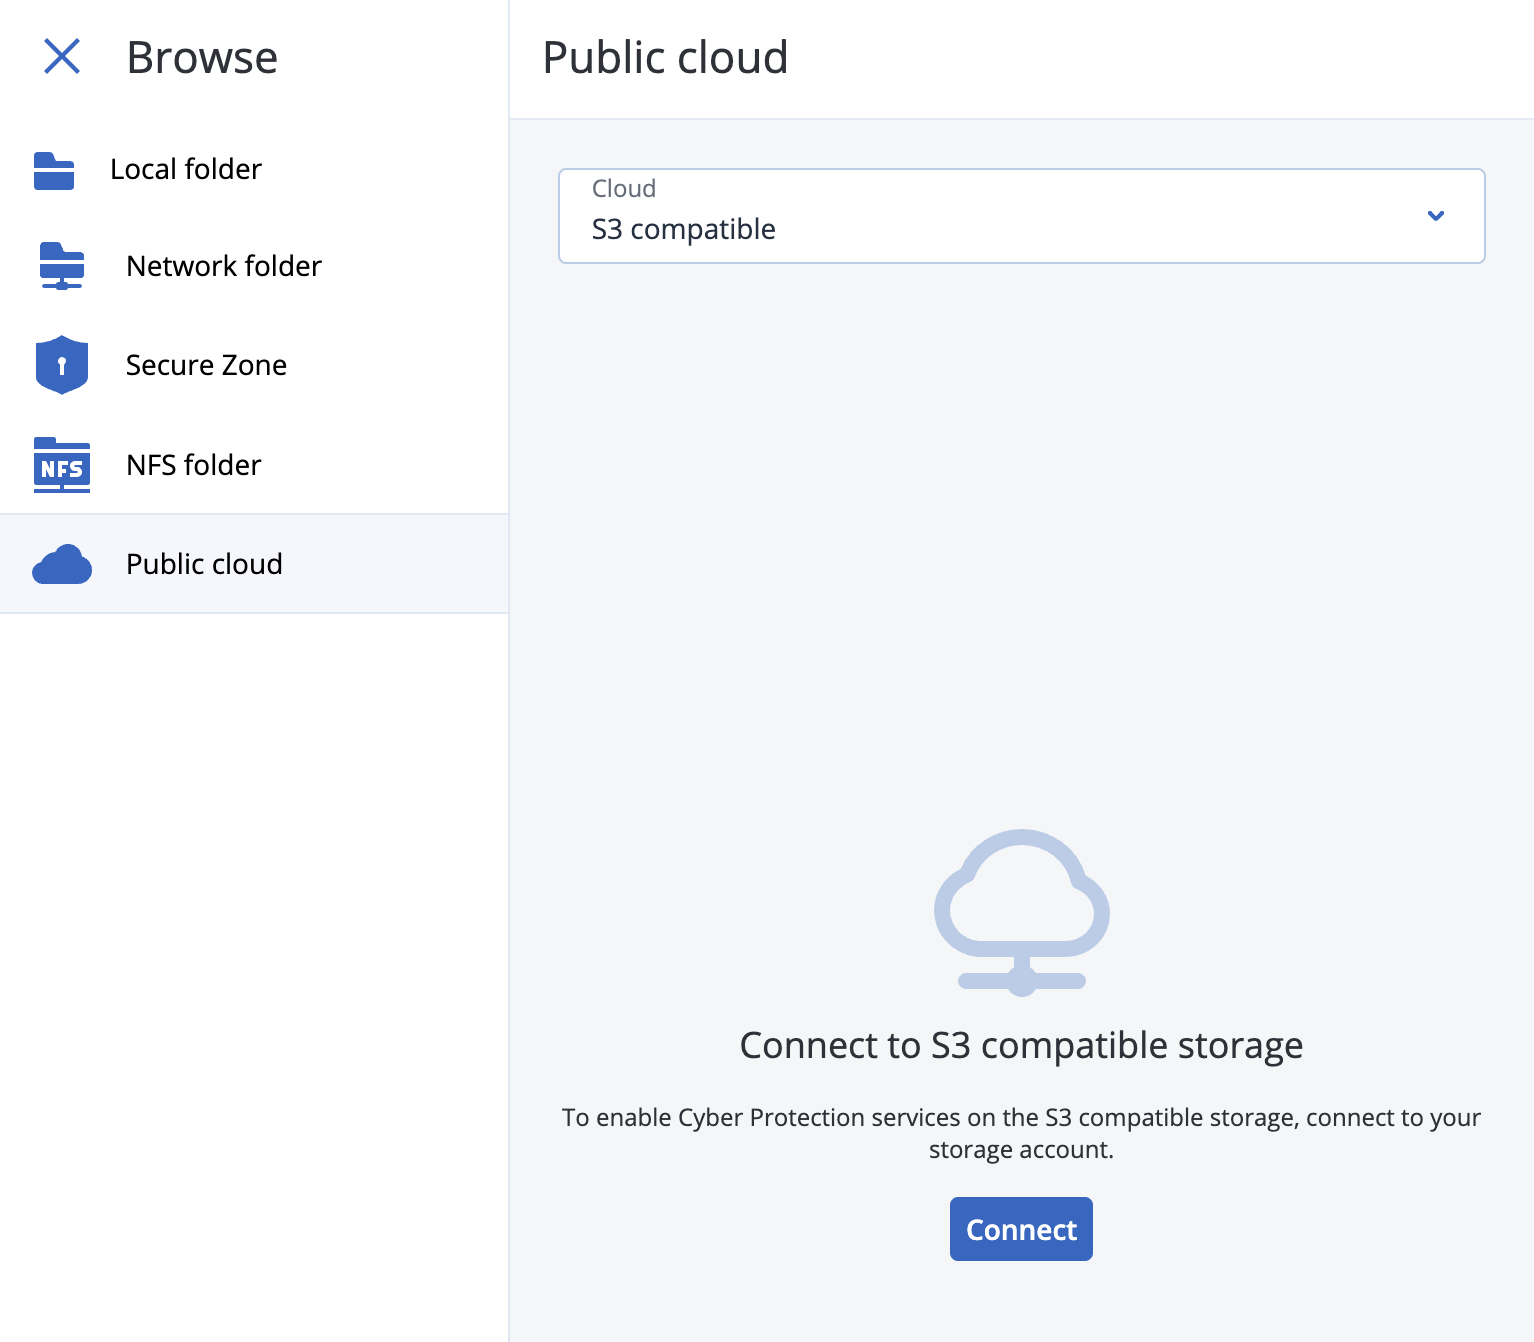
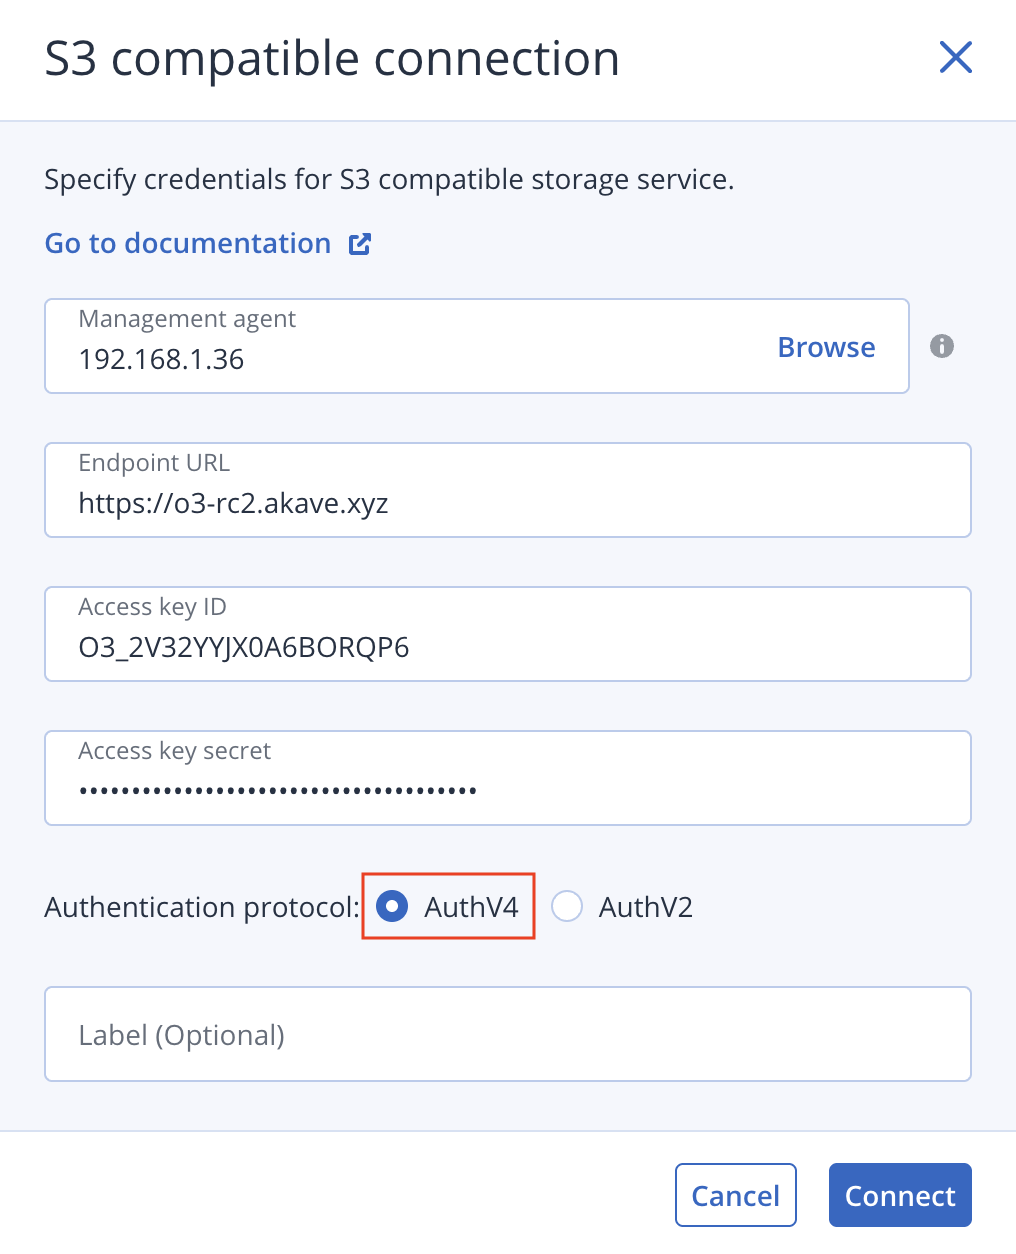
- Click “Connect” and enter your Akave credentials:
- Endpoint URL
- Access Key ID
- Secret Access Key
- Select the “AuthV4” authentication protocol
Note: In the menu below, the “Management Agent” option is the device you set up in Step 2.
Then select the bucket you would like to use for backups (you should have already created this bucket using the same credentials used above).
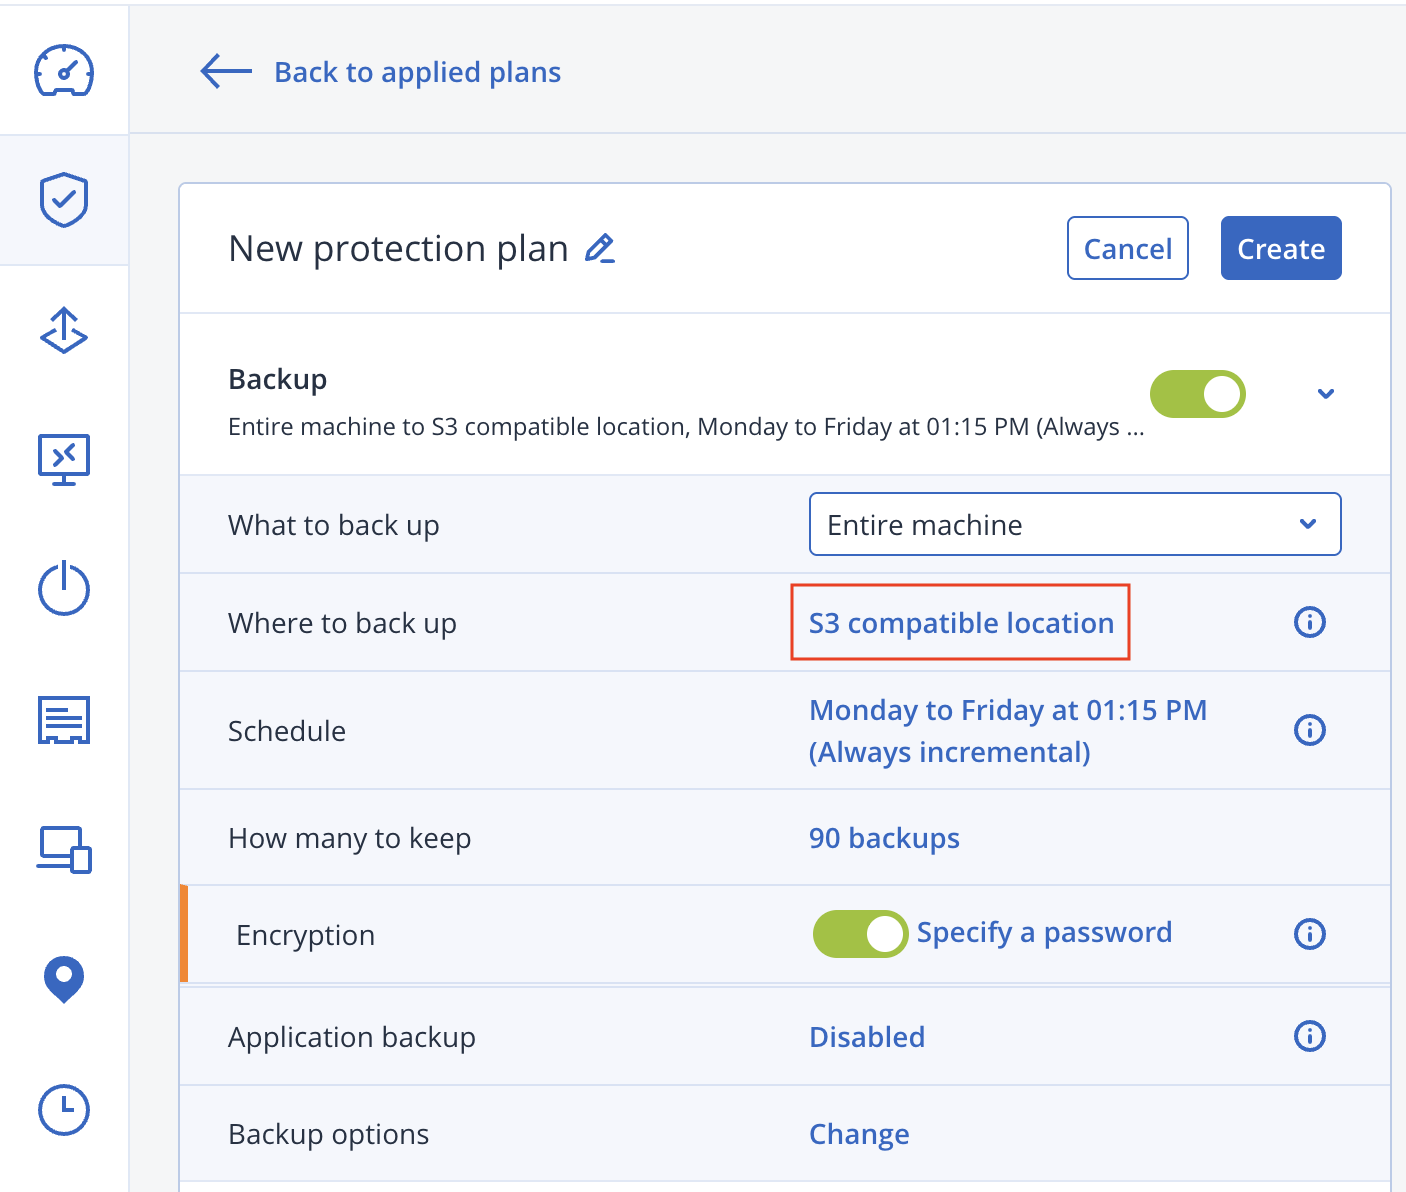
- Once you have installed the Management Agent, you can create a backup plan for the device by selecting the device from the console then selecting Protect → Create Plan → Protection and then configuring the backup settings as needed. Just make sure to select “S3 compatible location” which you set up in the previous steps for the “Where to back up” option.
- You can now run backups and restore data as needed. To test that the backup is working correctly, select “Run now” on the backup plan you created in the last step.
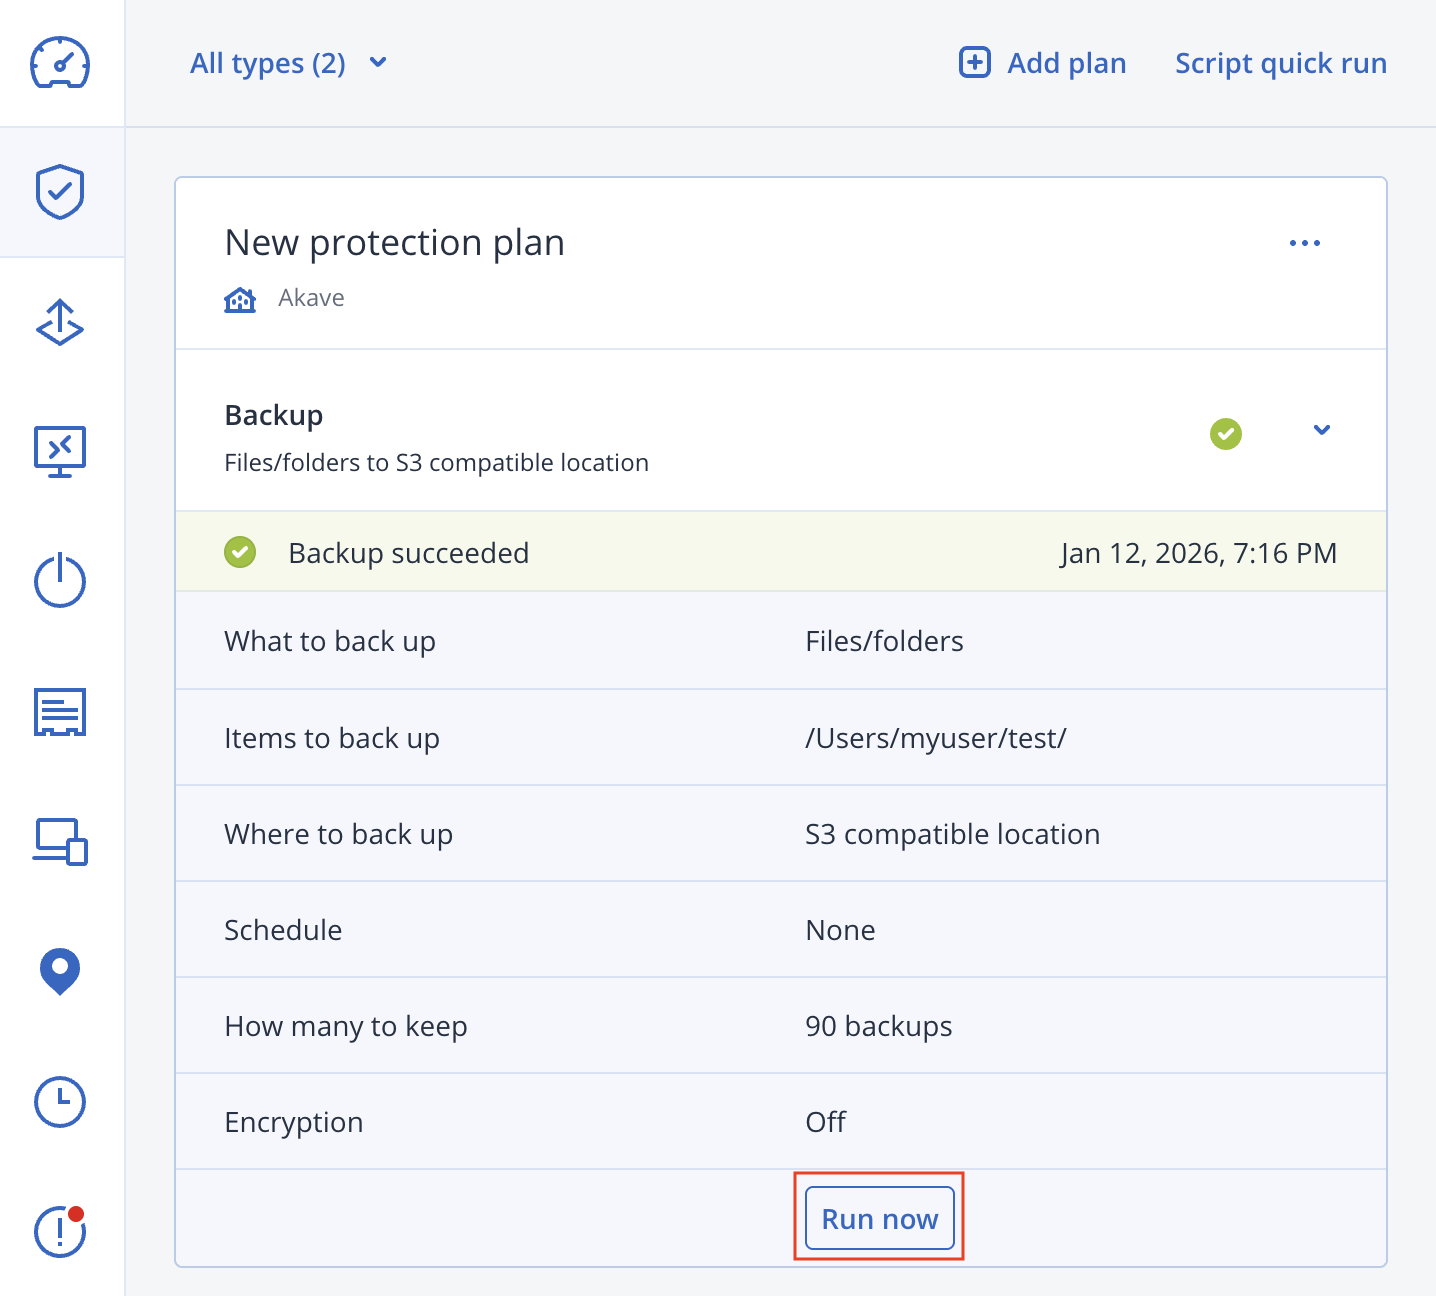
You should see a folder similar to the following in the bucket you selected for your backups:

This directory contains the backup data for your device stored in a binary format Acronis uses to reconstruct the backup.
Acronis Cyber Infrastructure (Backup Gateway)
This option is best when you want a dedicated gateway you control (deployment region, networking/VPC, instance sizing) while still using Akave for the underlying S3-compatible storage target.
Note: Acronis has a reference guide for using Amazon S3 storage with Acronis Backup Gateway deployed on EC2. The Akave setup is similar and requires a minor configuration change in the “Setting up Backup Gateway” section, and the below instructions closely follow their setup process.
Launching the Gateway
- From AWS Marketplace, open Acronis Backup Gateway:
- Subscribe to the software (free) and launch the software using the “Launch your software” button.
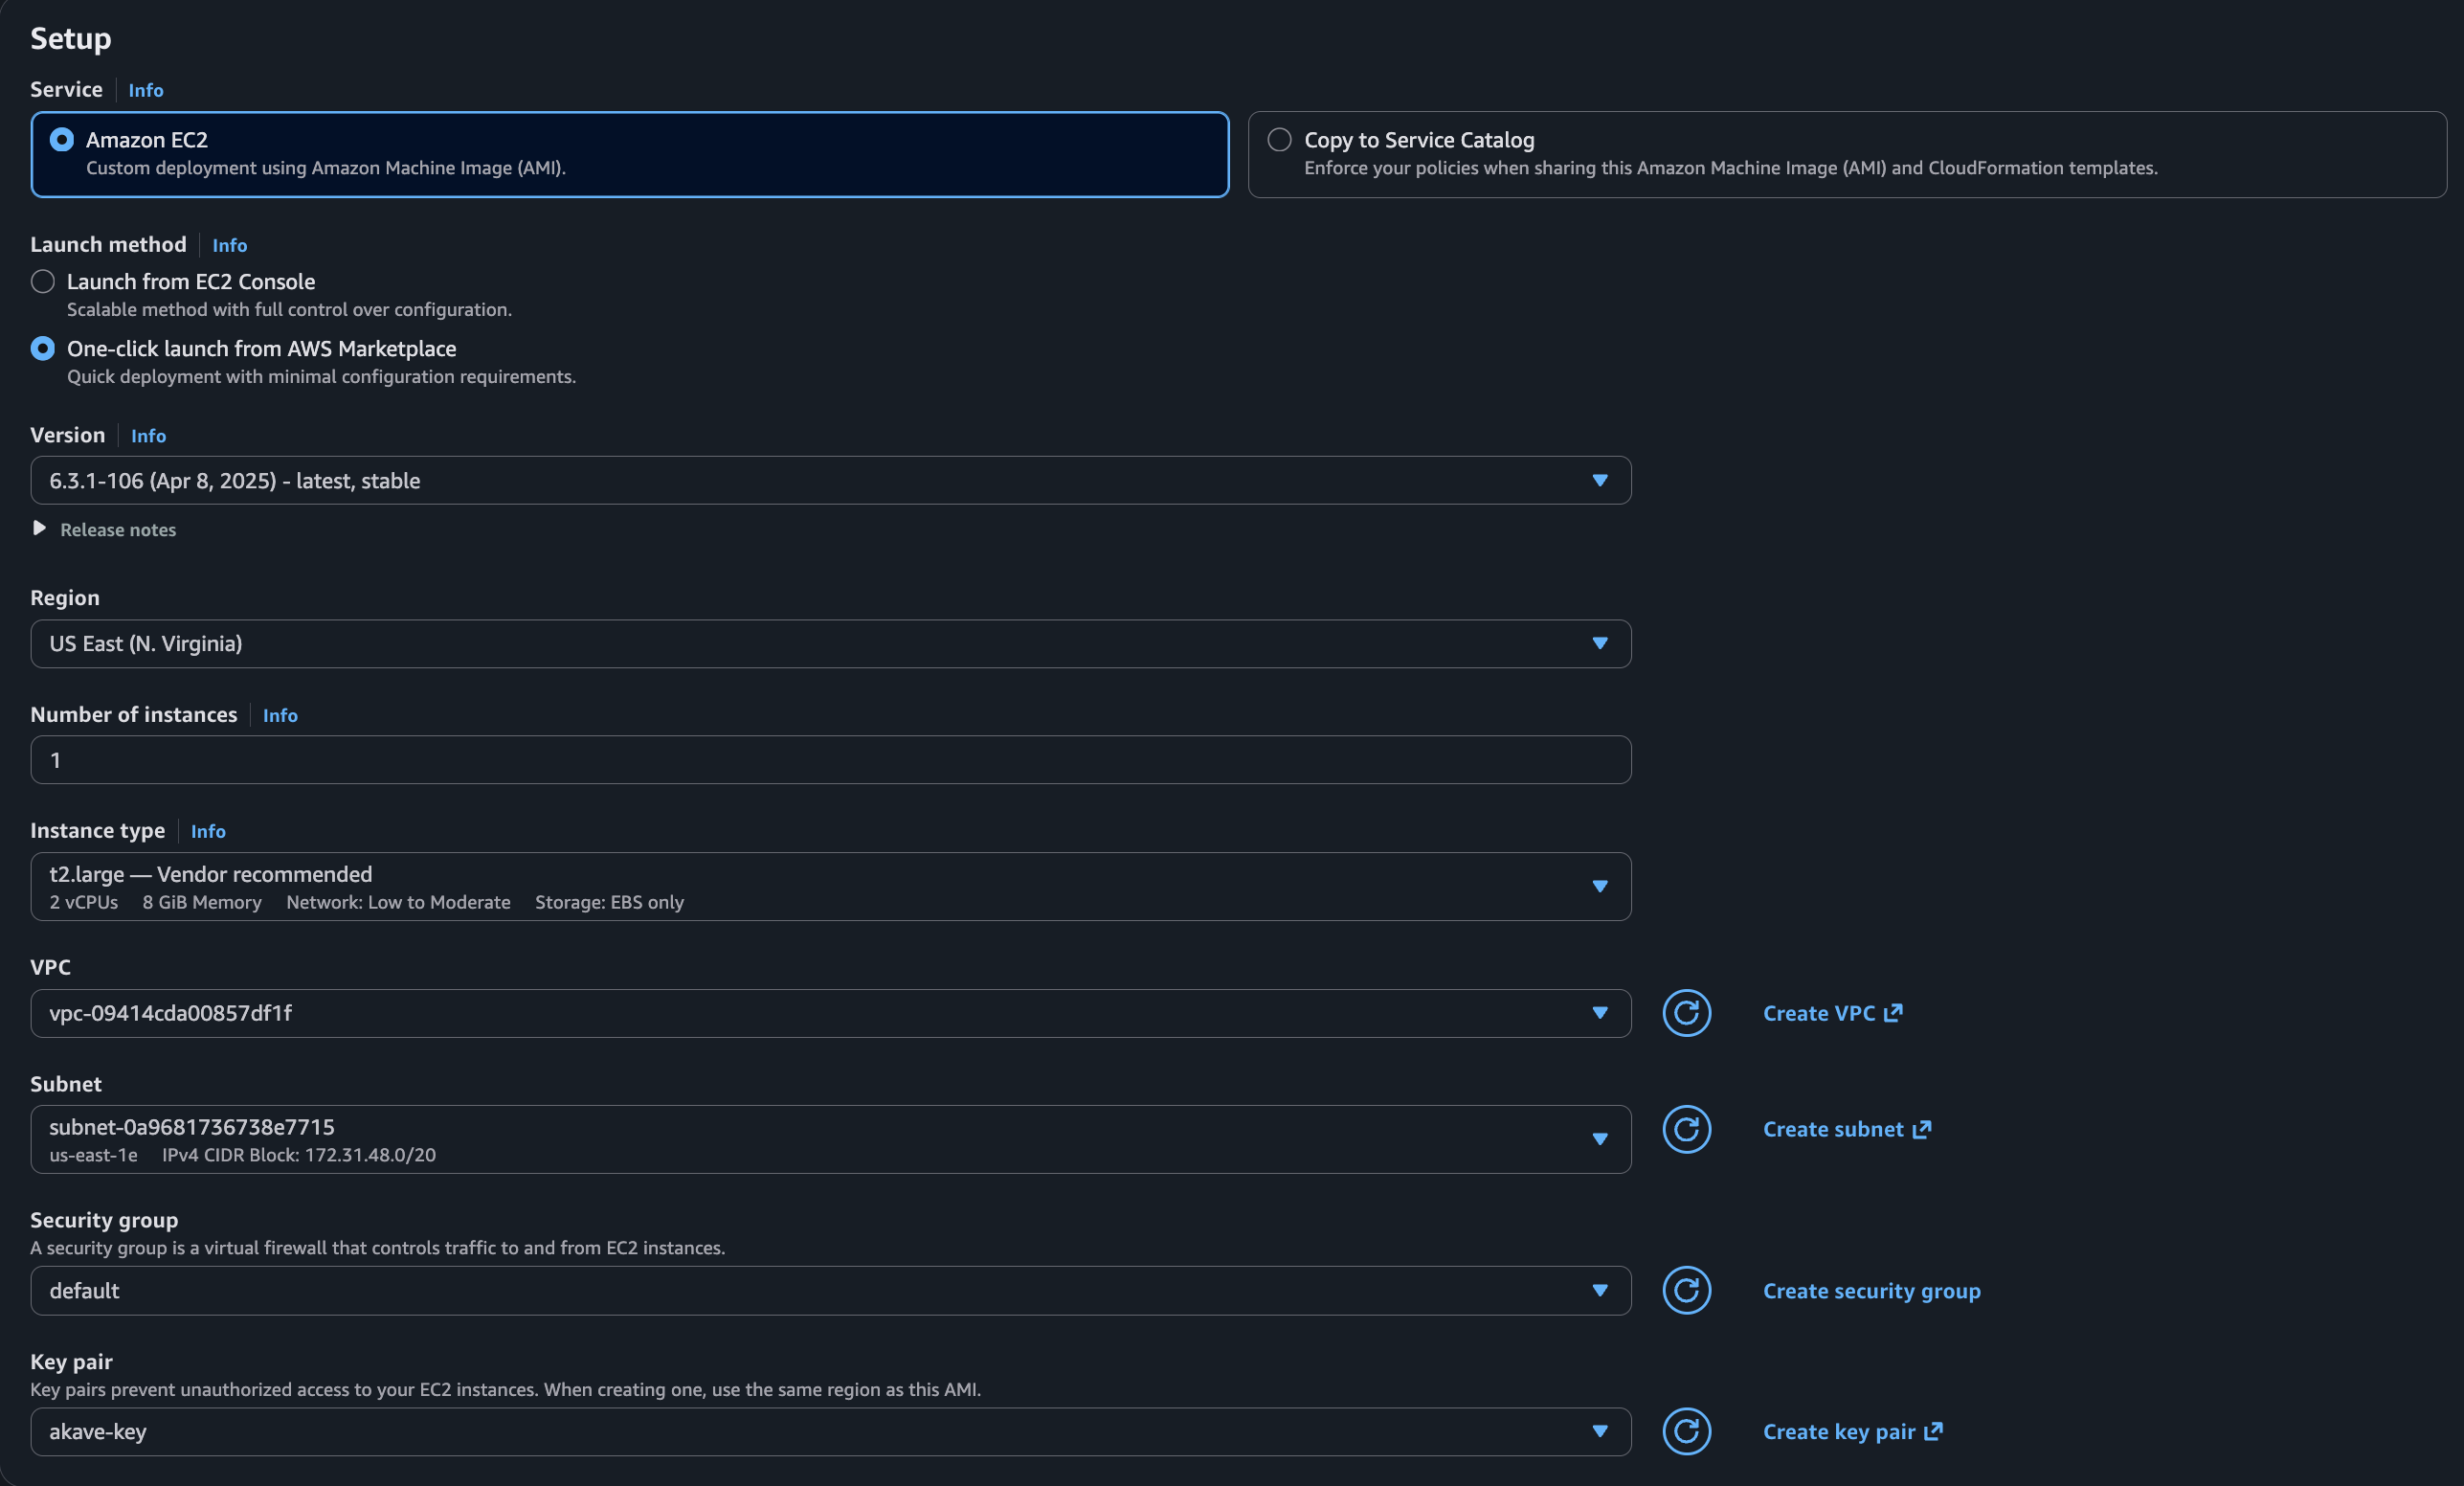
For the instance configuration select the following options:
- Service: Amazon EC2
- Launch Method: One-click launch from AWS Marketplace
- Version: Latest stable
- Region: Preferred region (example:
US East (N. Virginia)) - Instances: 1
- Instance type:
t2.large - Choose a VPC, subnet, security group, and key pair. Instructions for creating these can be found in the AWS documentation:
You’re now ready to launch the instance!
Connecting to the Gateway
- After launching, you’ll see the button which says “View instance on EC2” which you can click to view the instance in a new tab, and then click “Connect” to view the various connection instructions.
First click “View instance on EC2”:

Then click “Connect”:

We’ll be connecting to the instance using SSH and the key file created in the previous step (e.g., name.pem):
chmod 400 name.pem
ssh -i "name.pem" cloud-user@ec2-54-237-90-228.compute-1.amazonaws.comname.pem with the name of your key file and ec2-54-237-90-228.compute-1.amazonaws.com with the public DNS of your EC2 instance. This public DNS will be different each time an instance is launched.- Once you’ve successfully connected to your instance, retrieve the initial admin password:
cat /.initial-admin-password- Login to the web portal using the password from the previous step and the
8888port for your instance.- Example:
https://ec2-54-237-90-228.compute-1.amazonaws.com:8888/ - username:
admin - password: value from
/.initial-admin-password
- Example:

Configuring the Gateway
Create and configure the Backup Gateway:
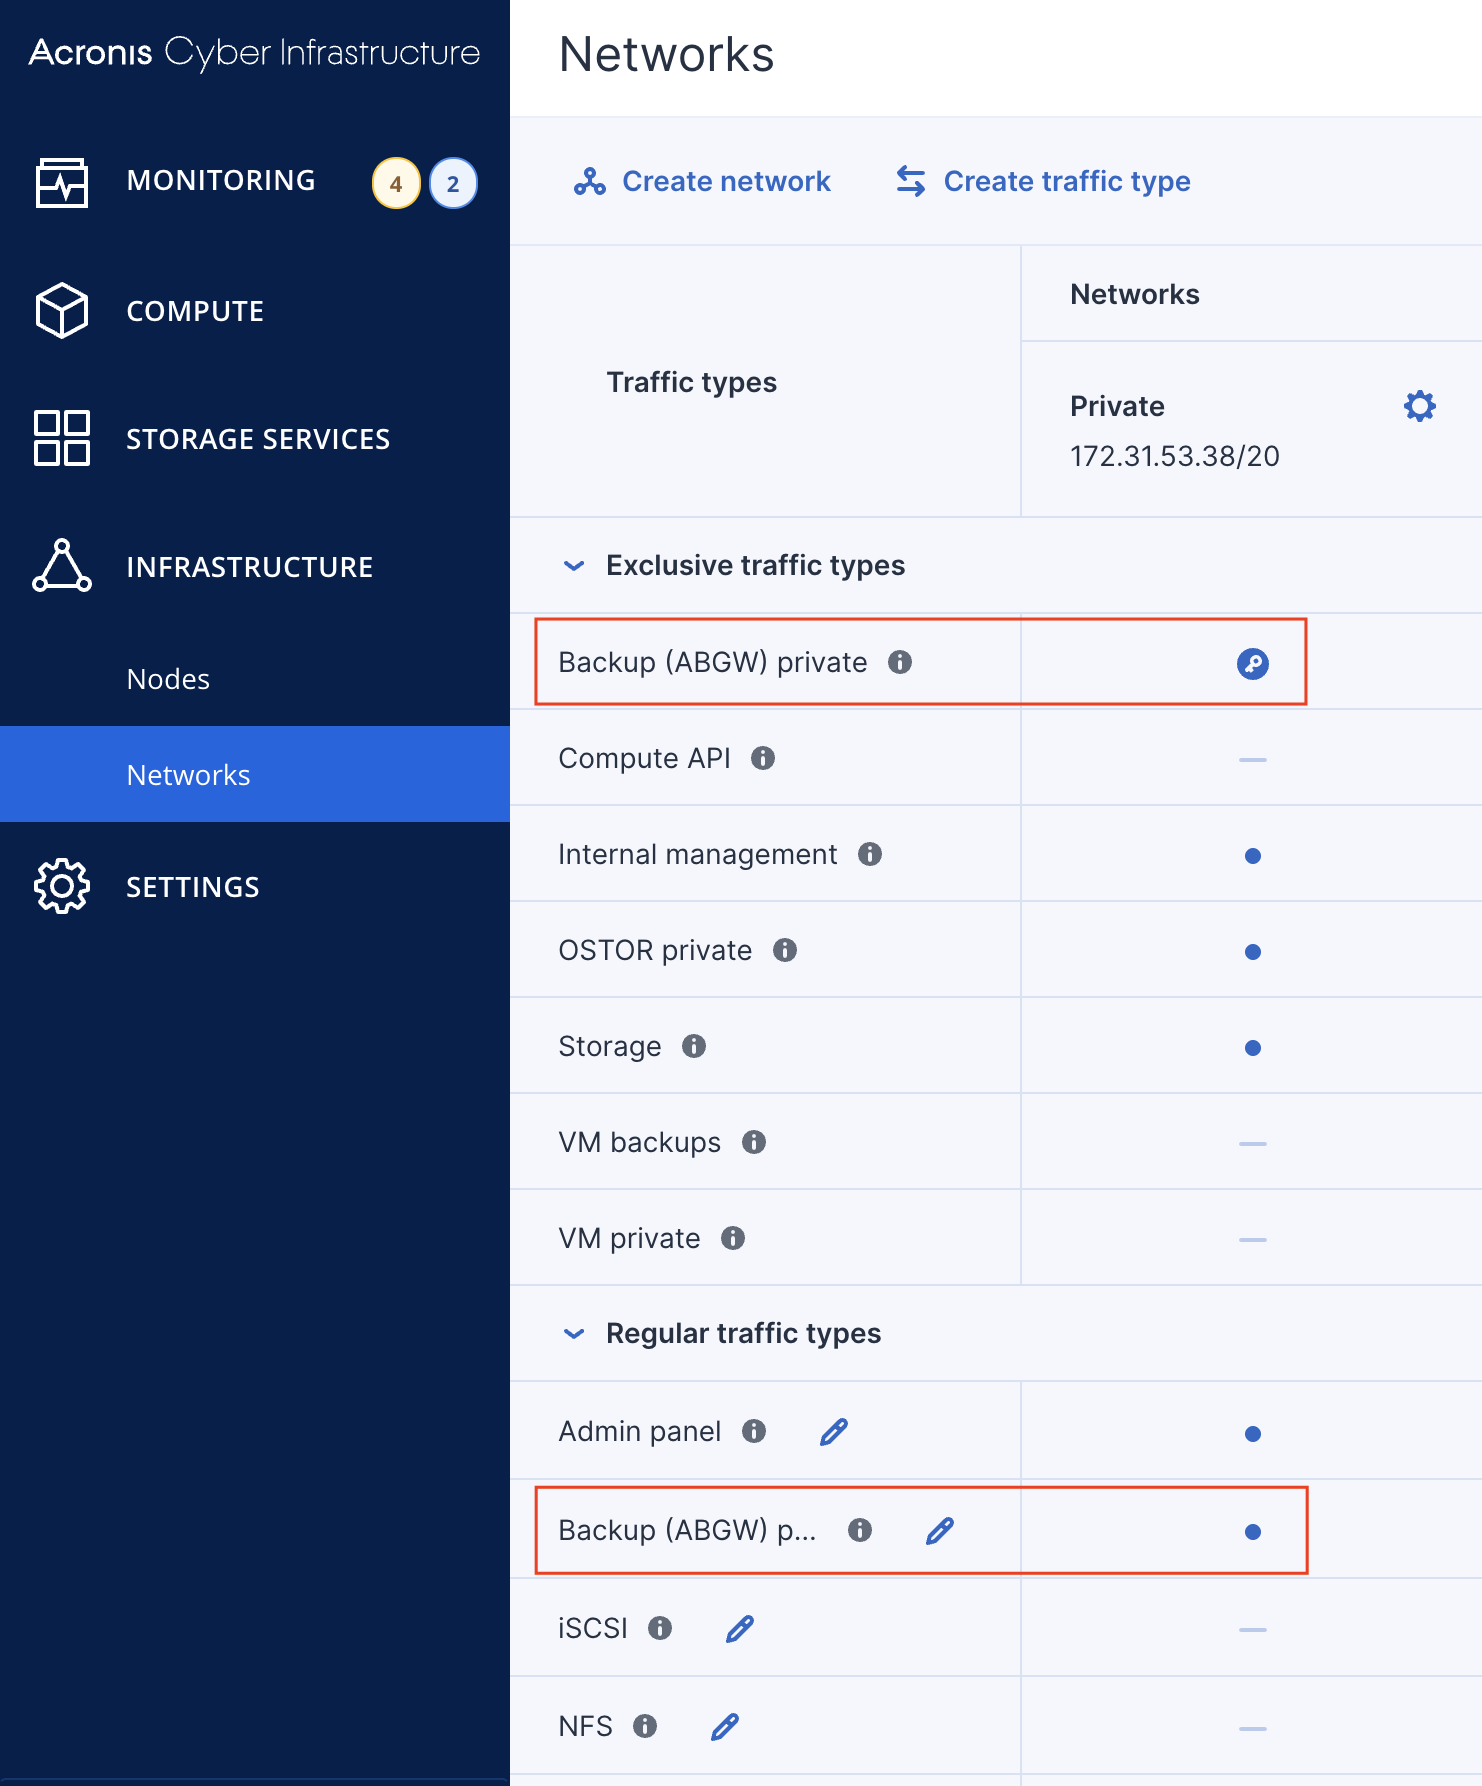
- Go to Infrastructure → Networks and ensure the network(s) you will use include:
- ABGW private traffic type
- ABGW public traffic type
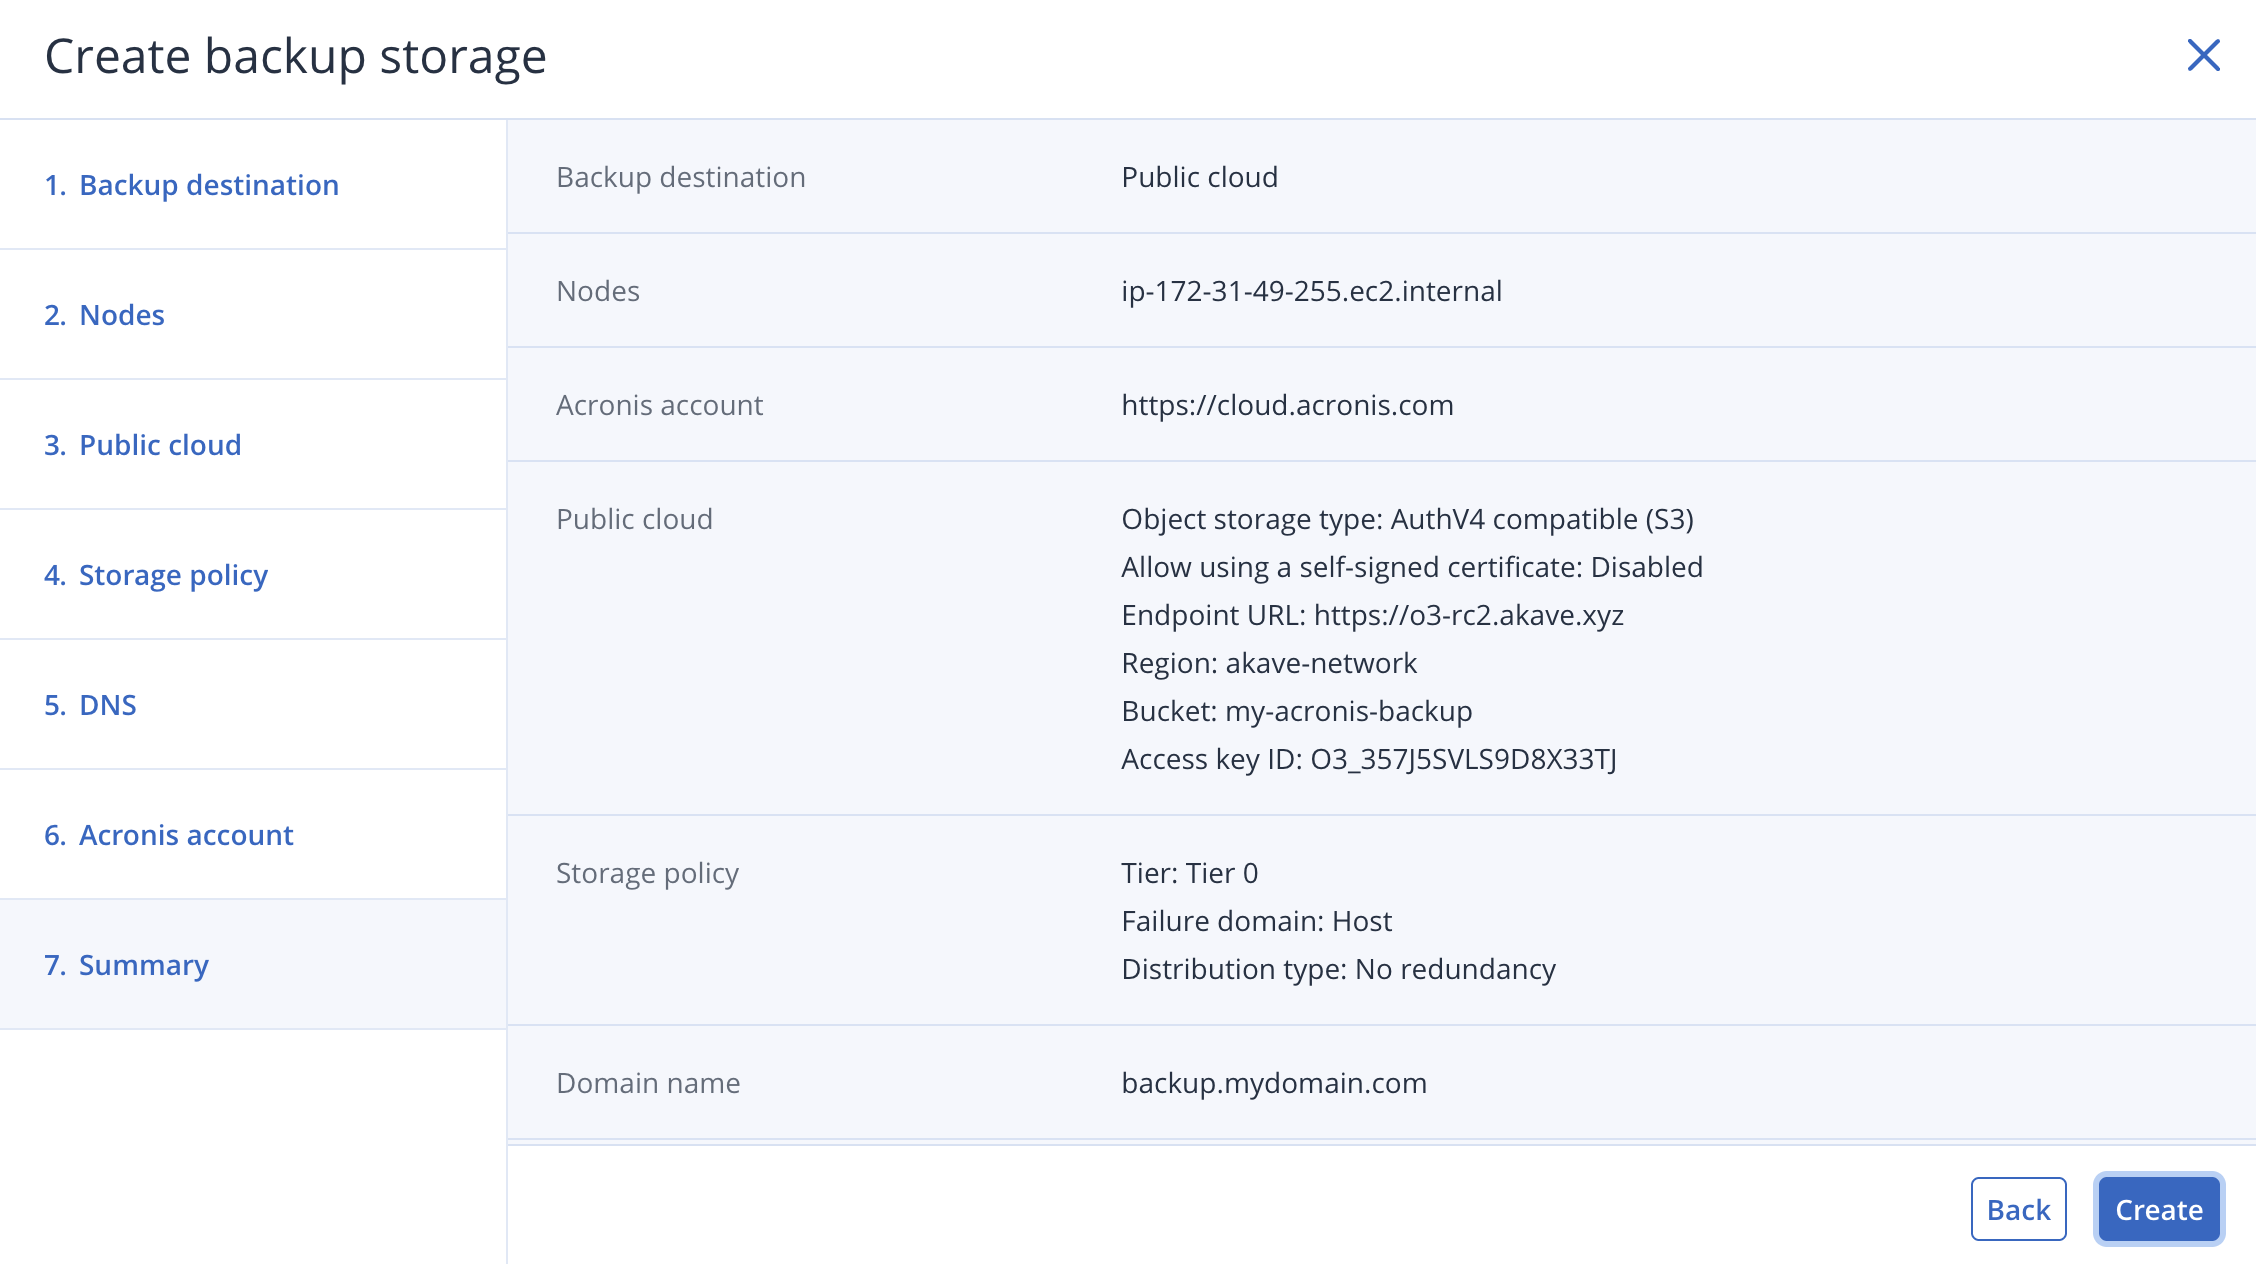
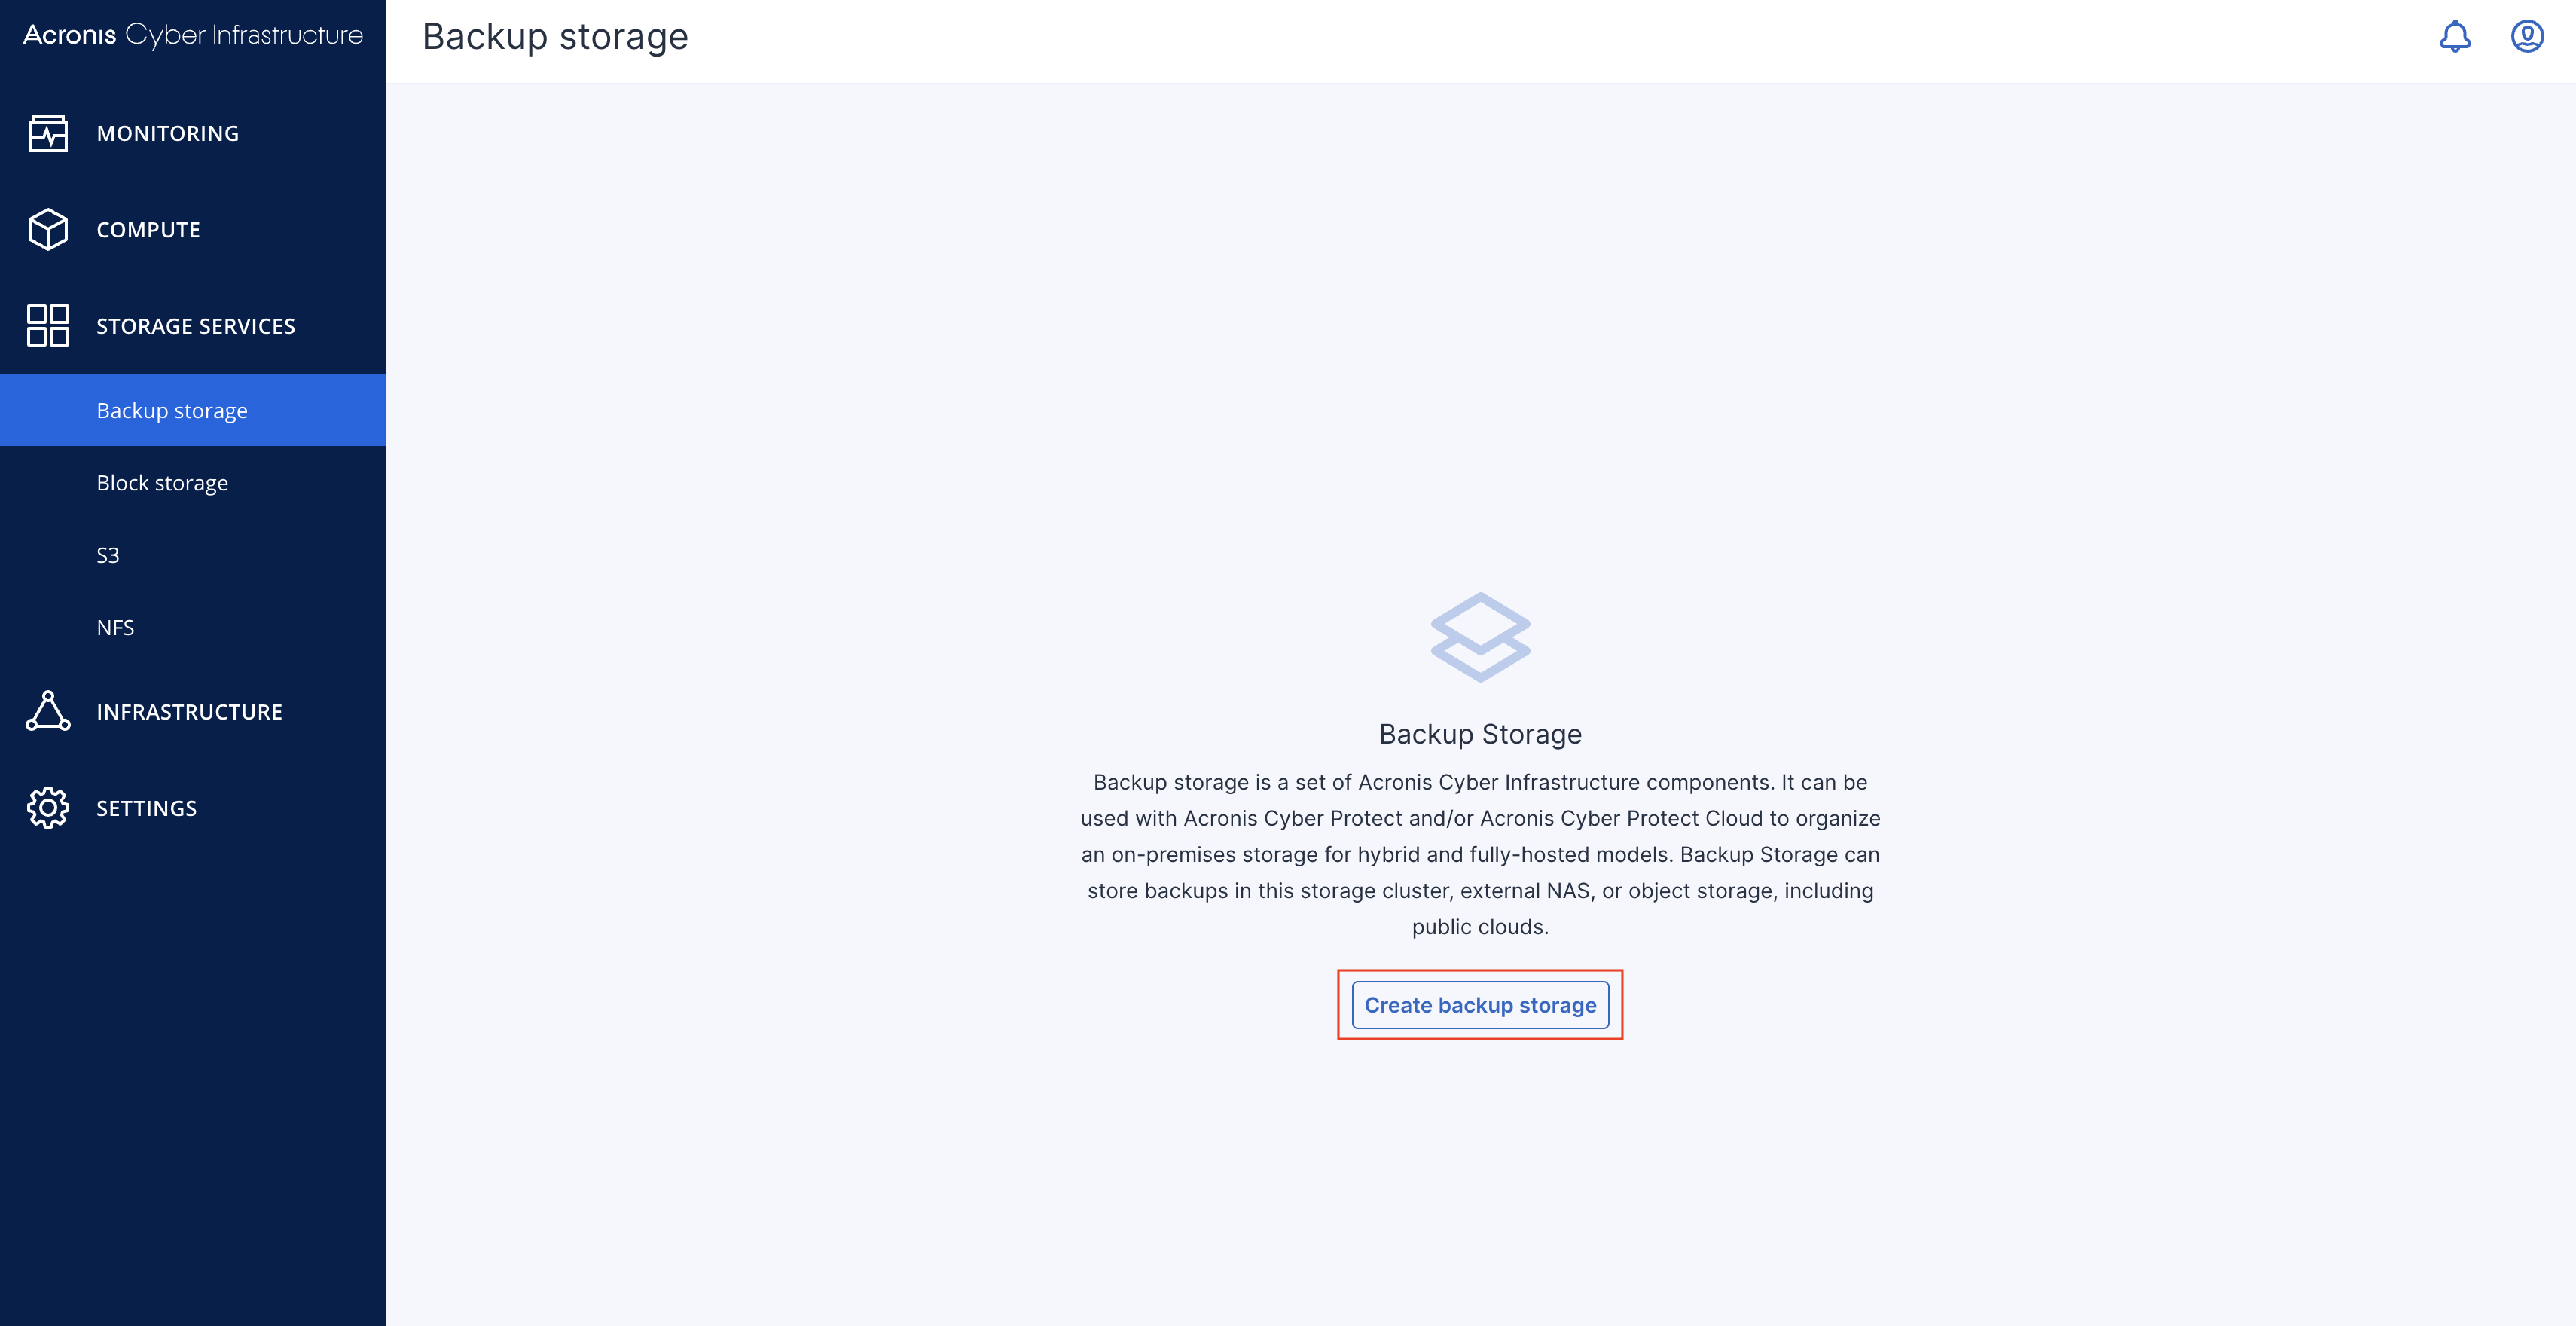
- In the left sidebar, click Storage services → Backup storage, then click Create Backup Storage.
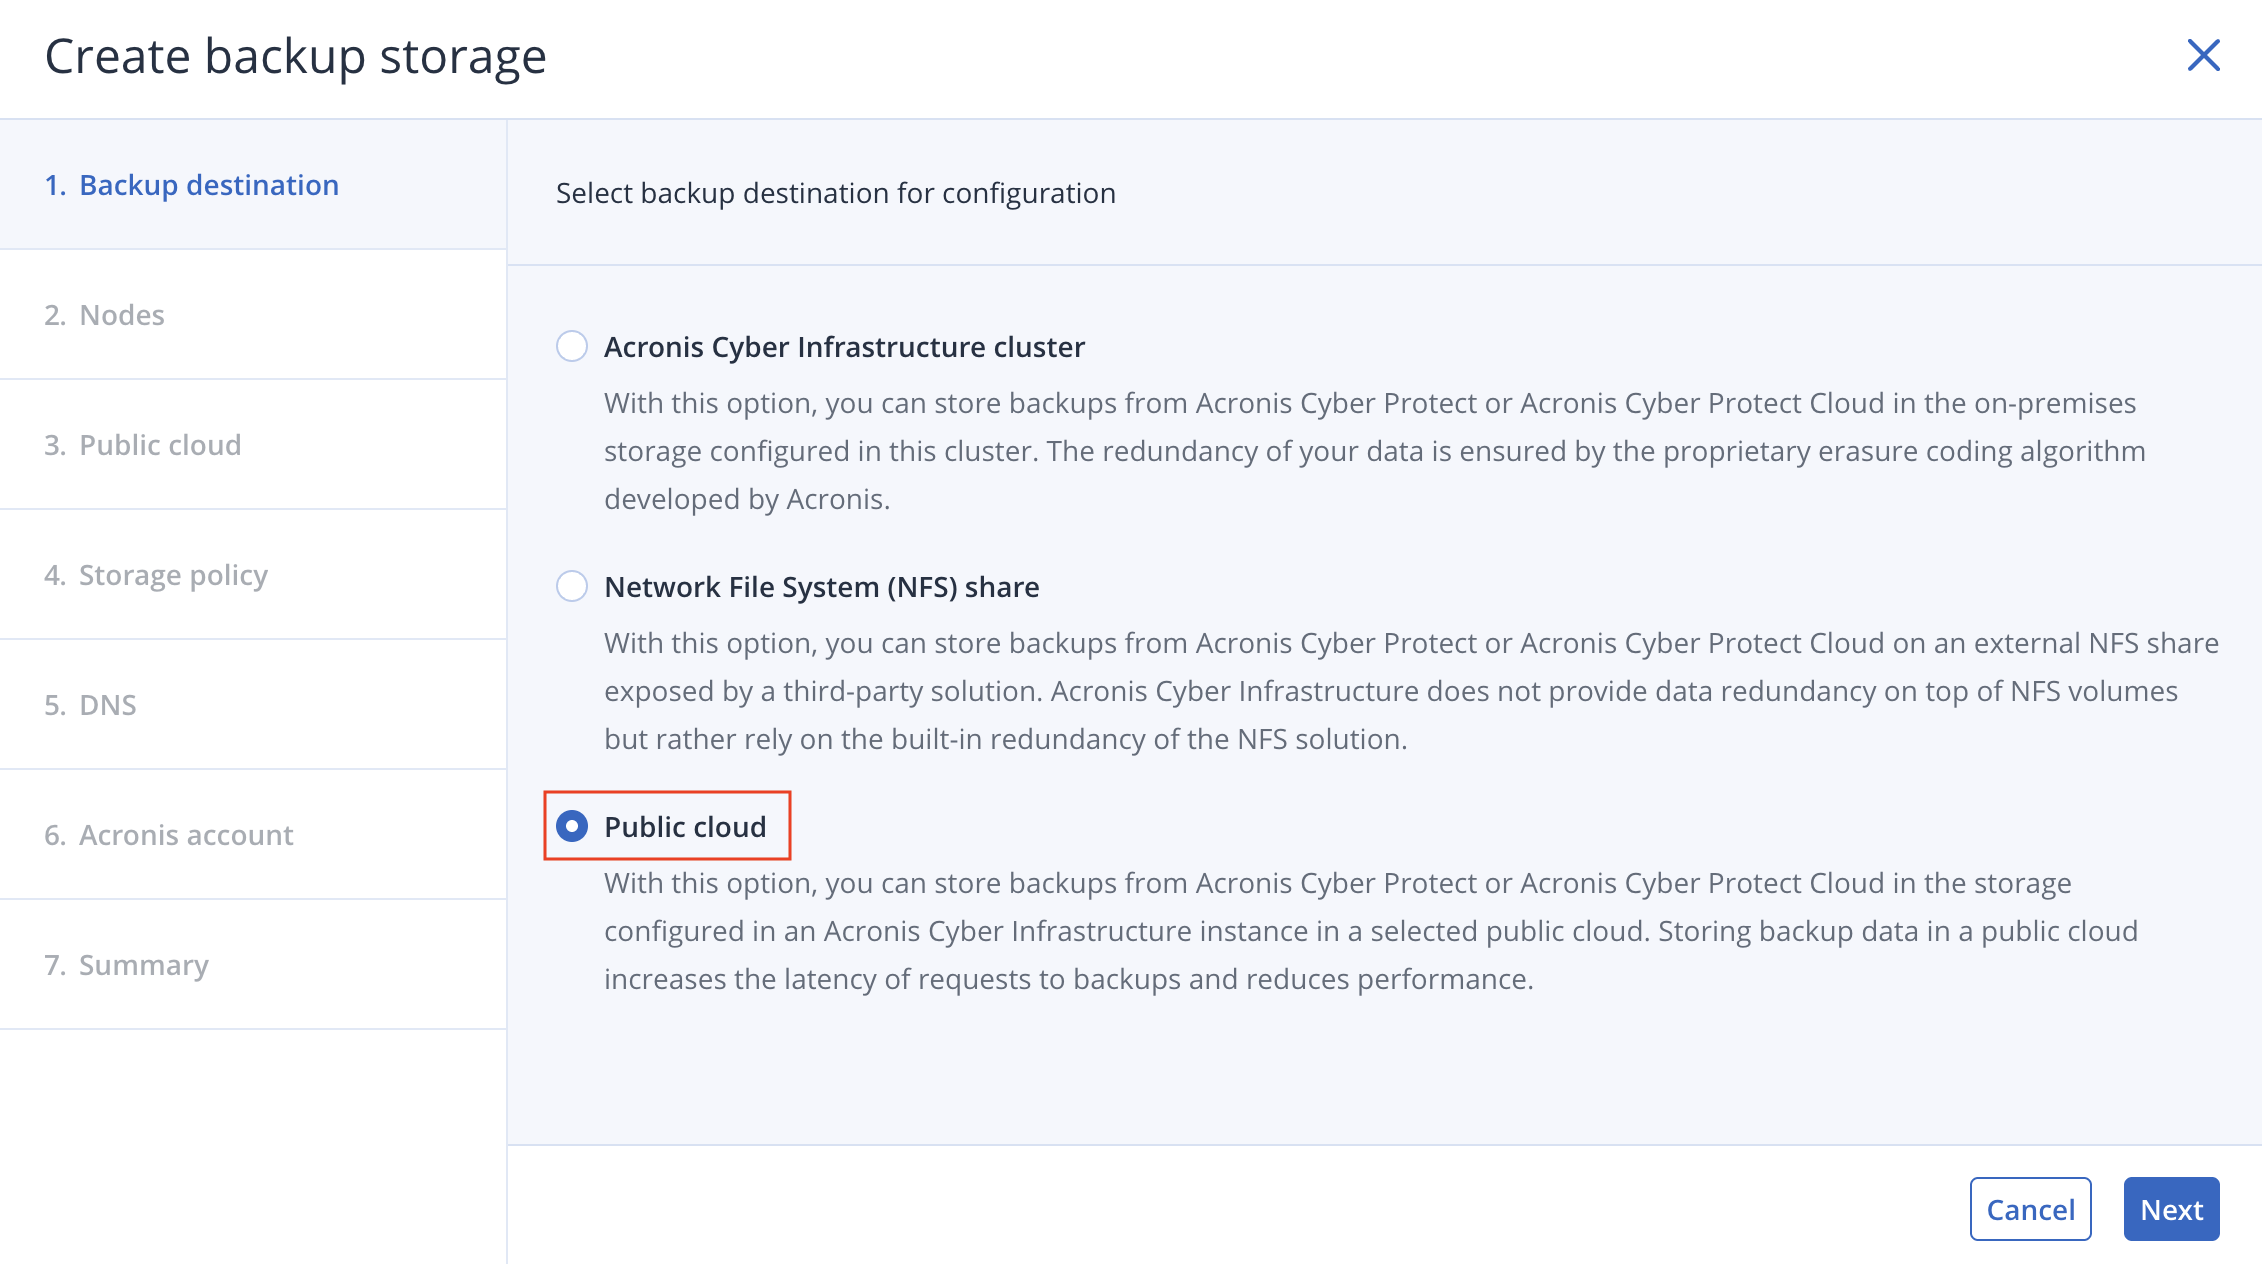
- Select Public Cloud as the storage type.
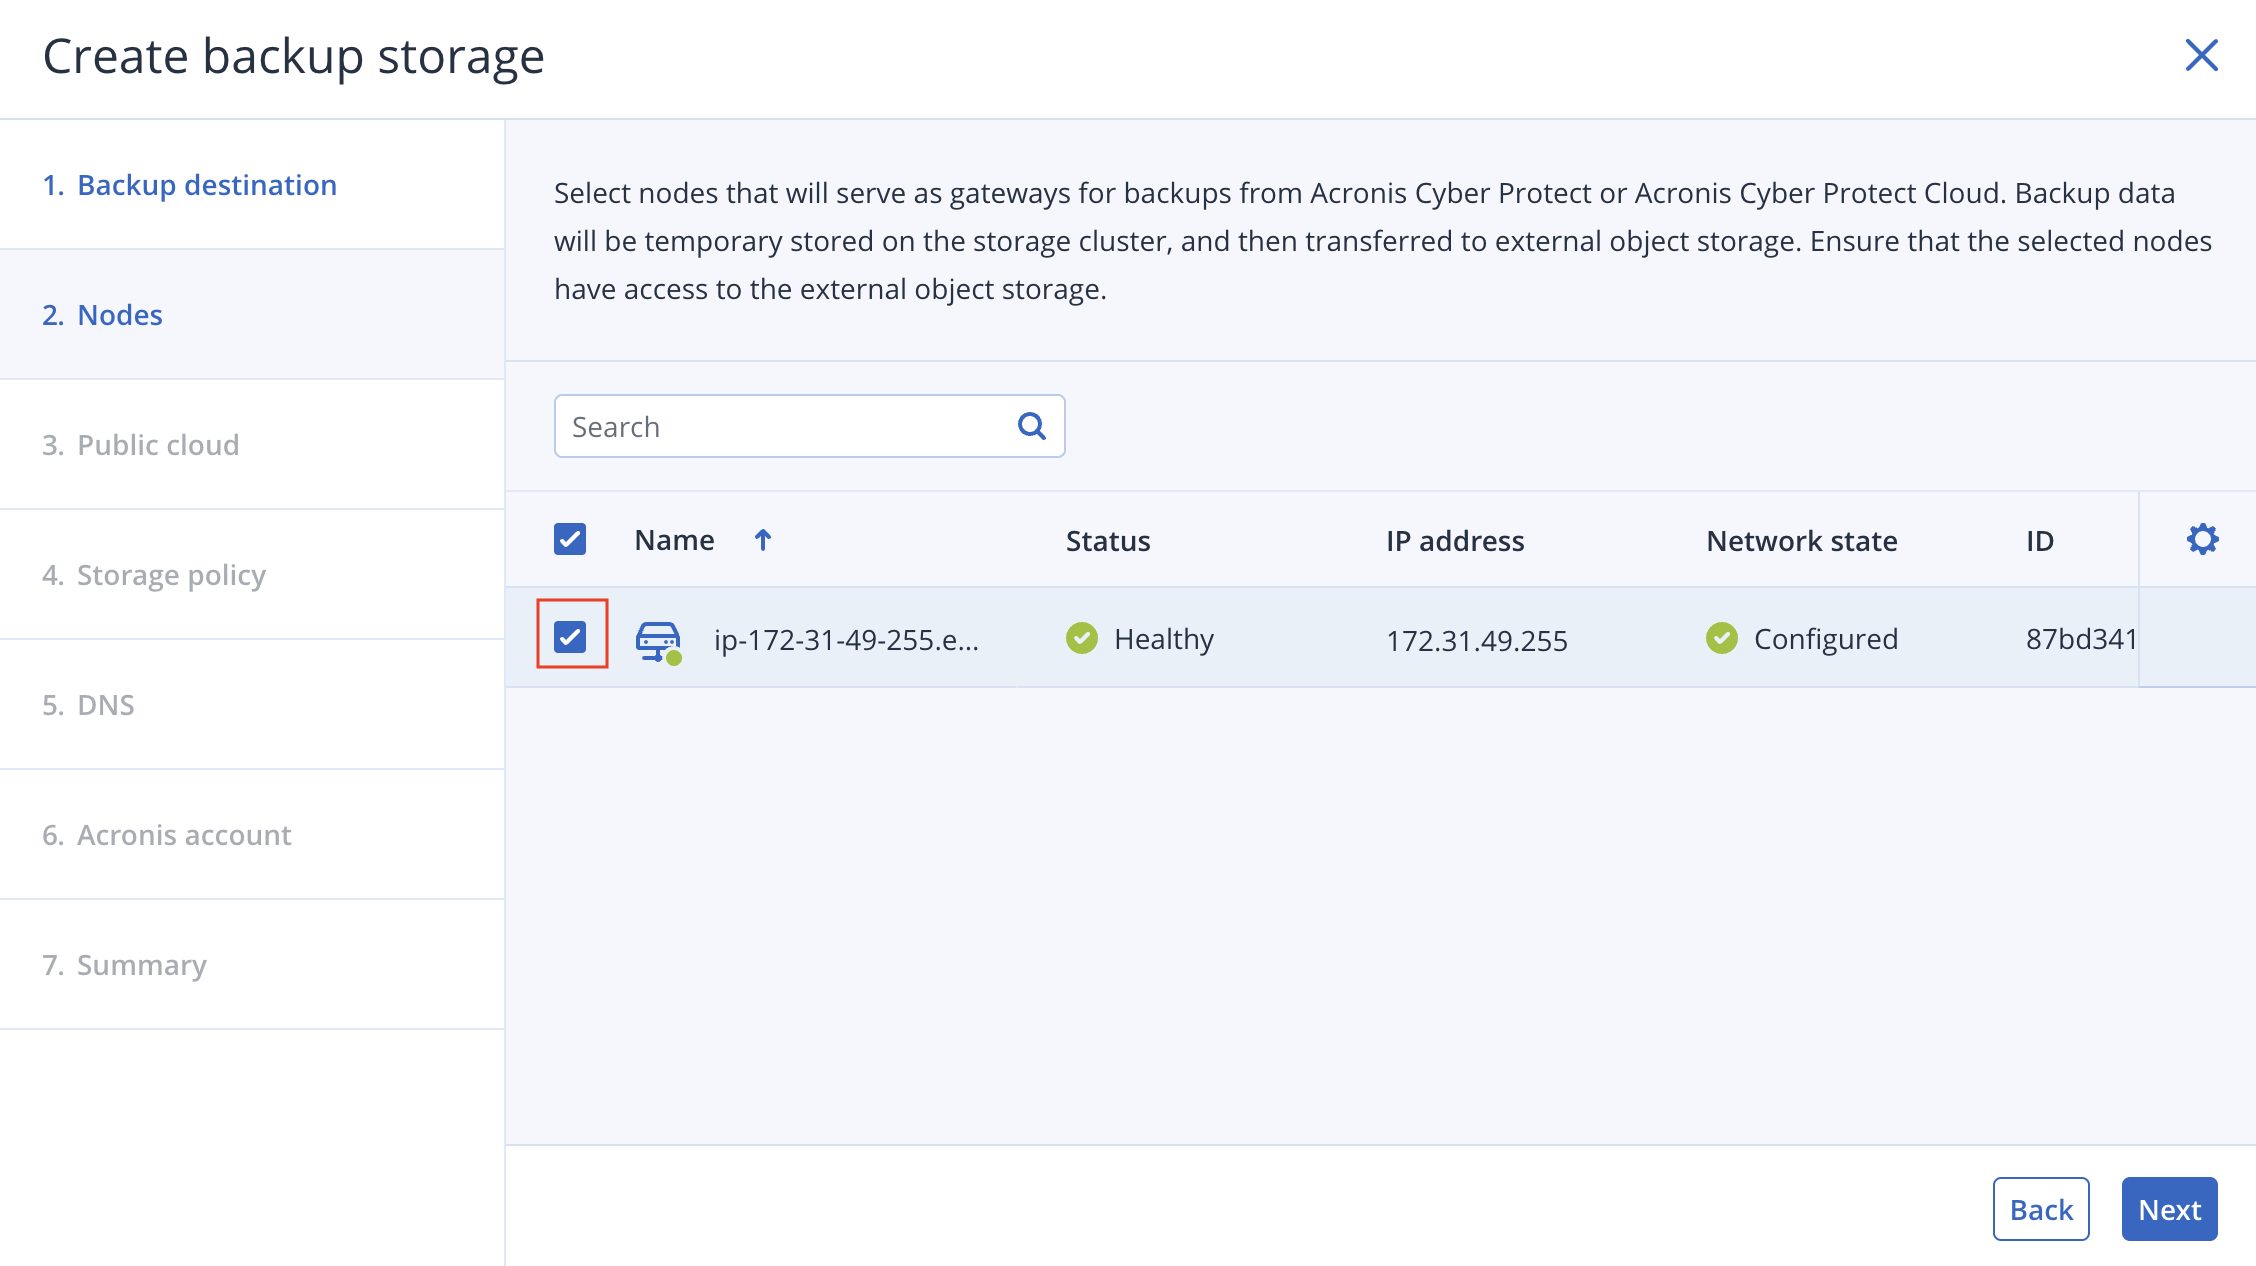
- Select the node(s) that will run the gateway services, then click Next.
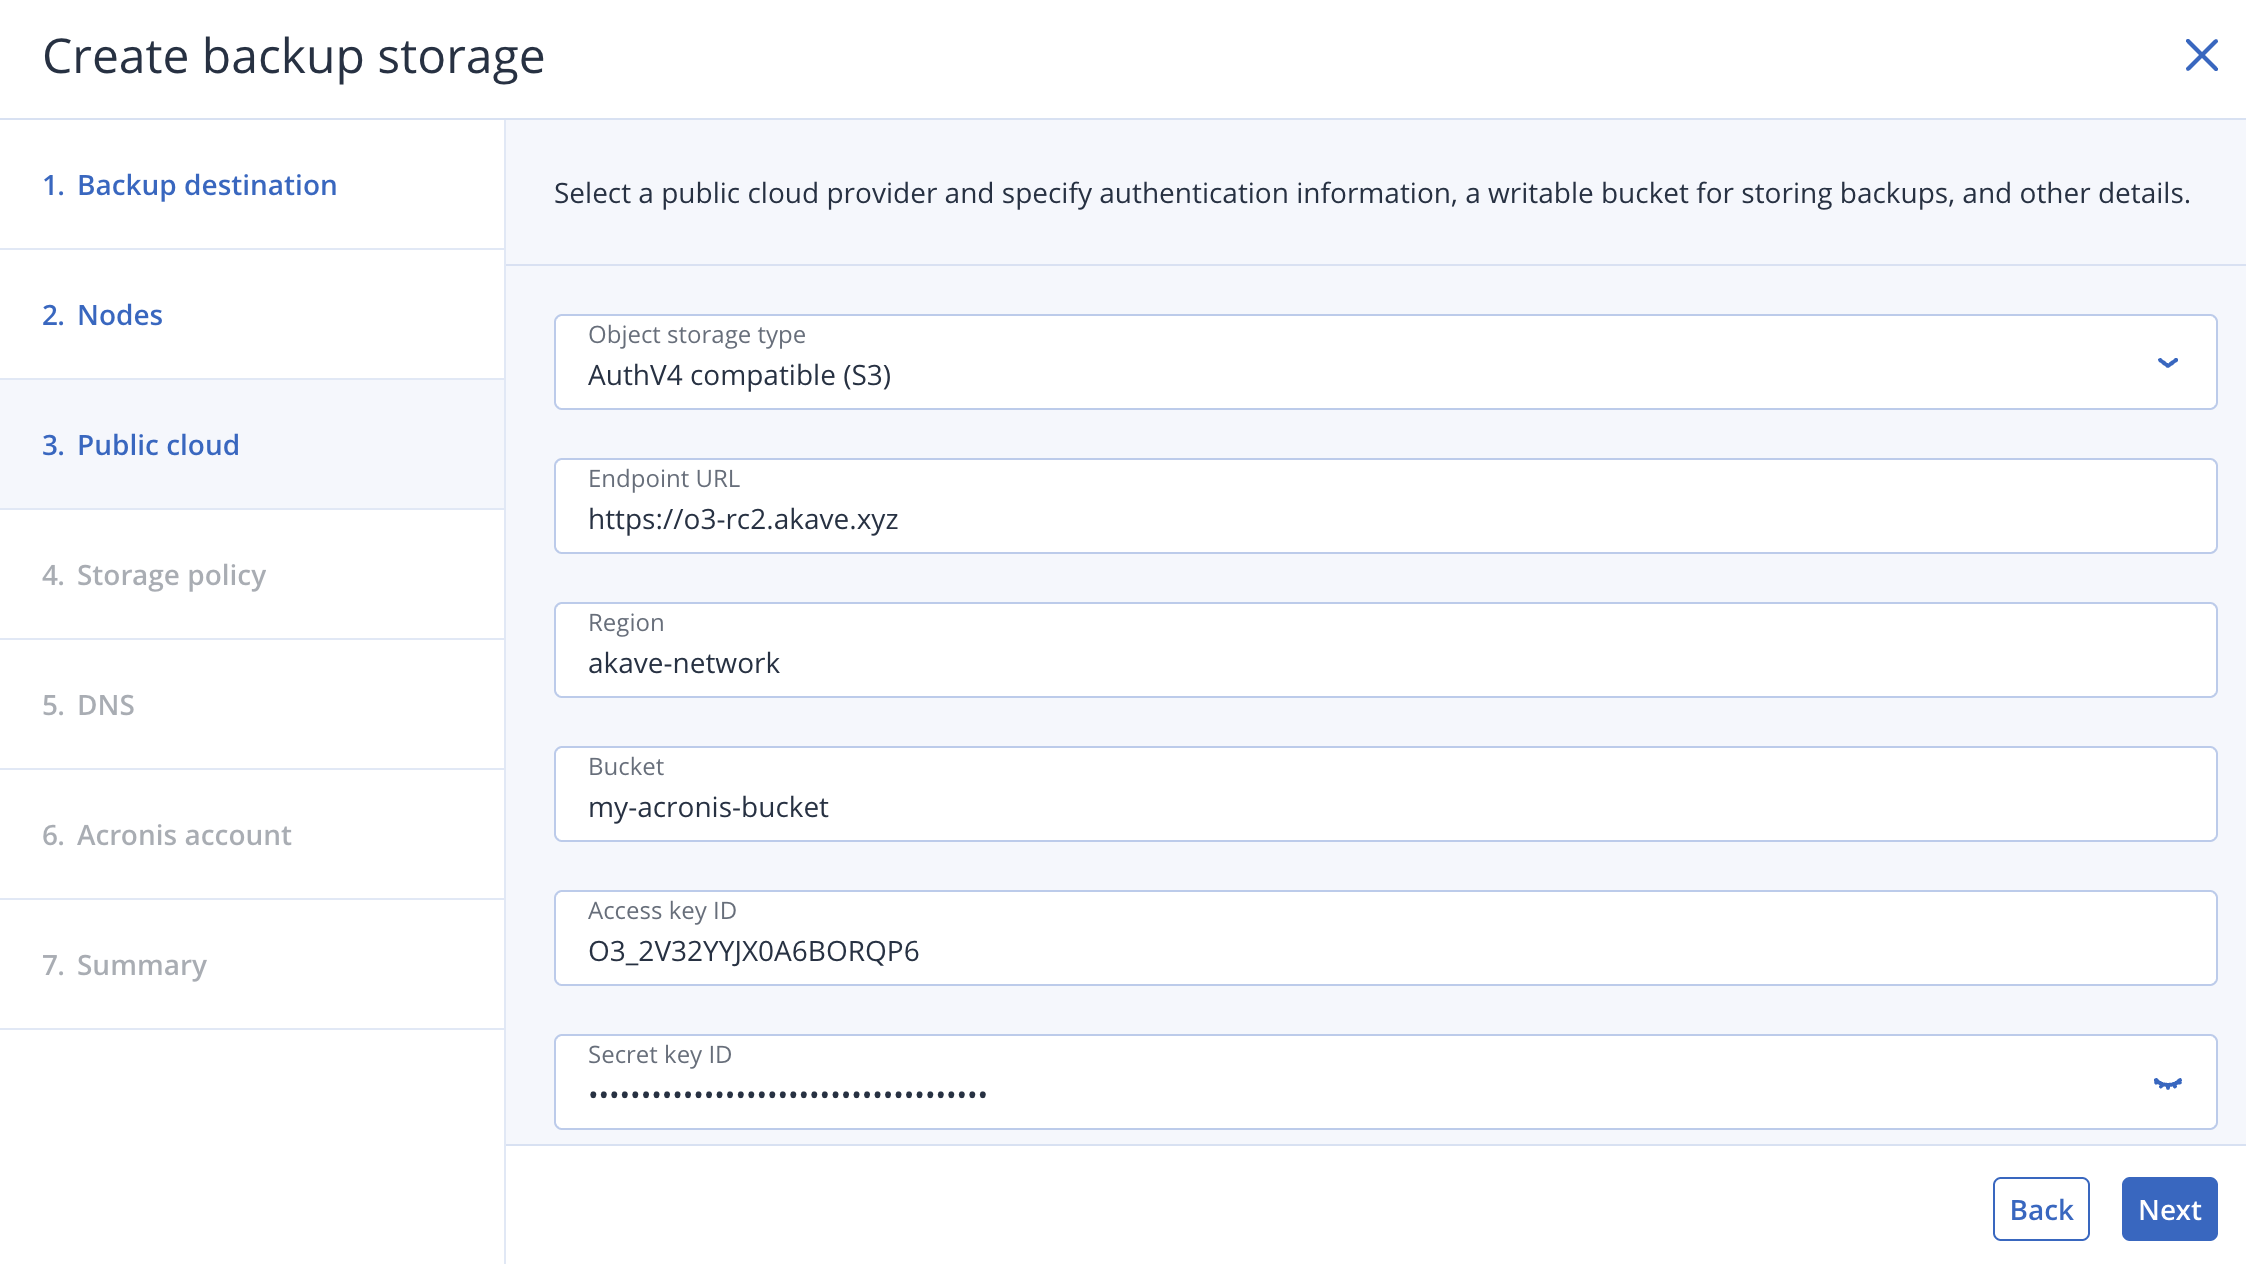
- On the Public cloud page, select AuthV4 compatible (S3) and fill out the S3 parameters using your Akave:
- Endpoint URL
- Region
- Bucket name
- Access Key ID
- Secret Access Key
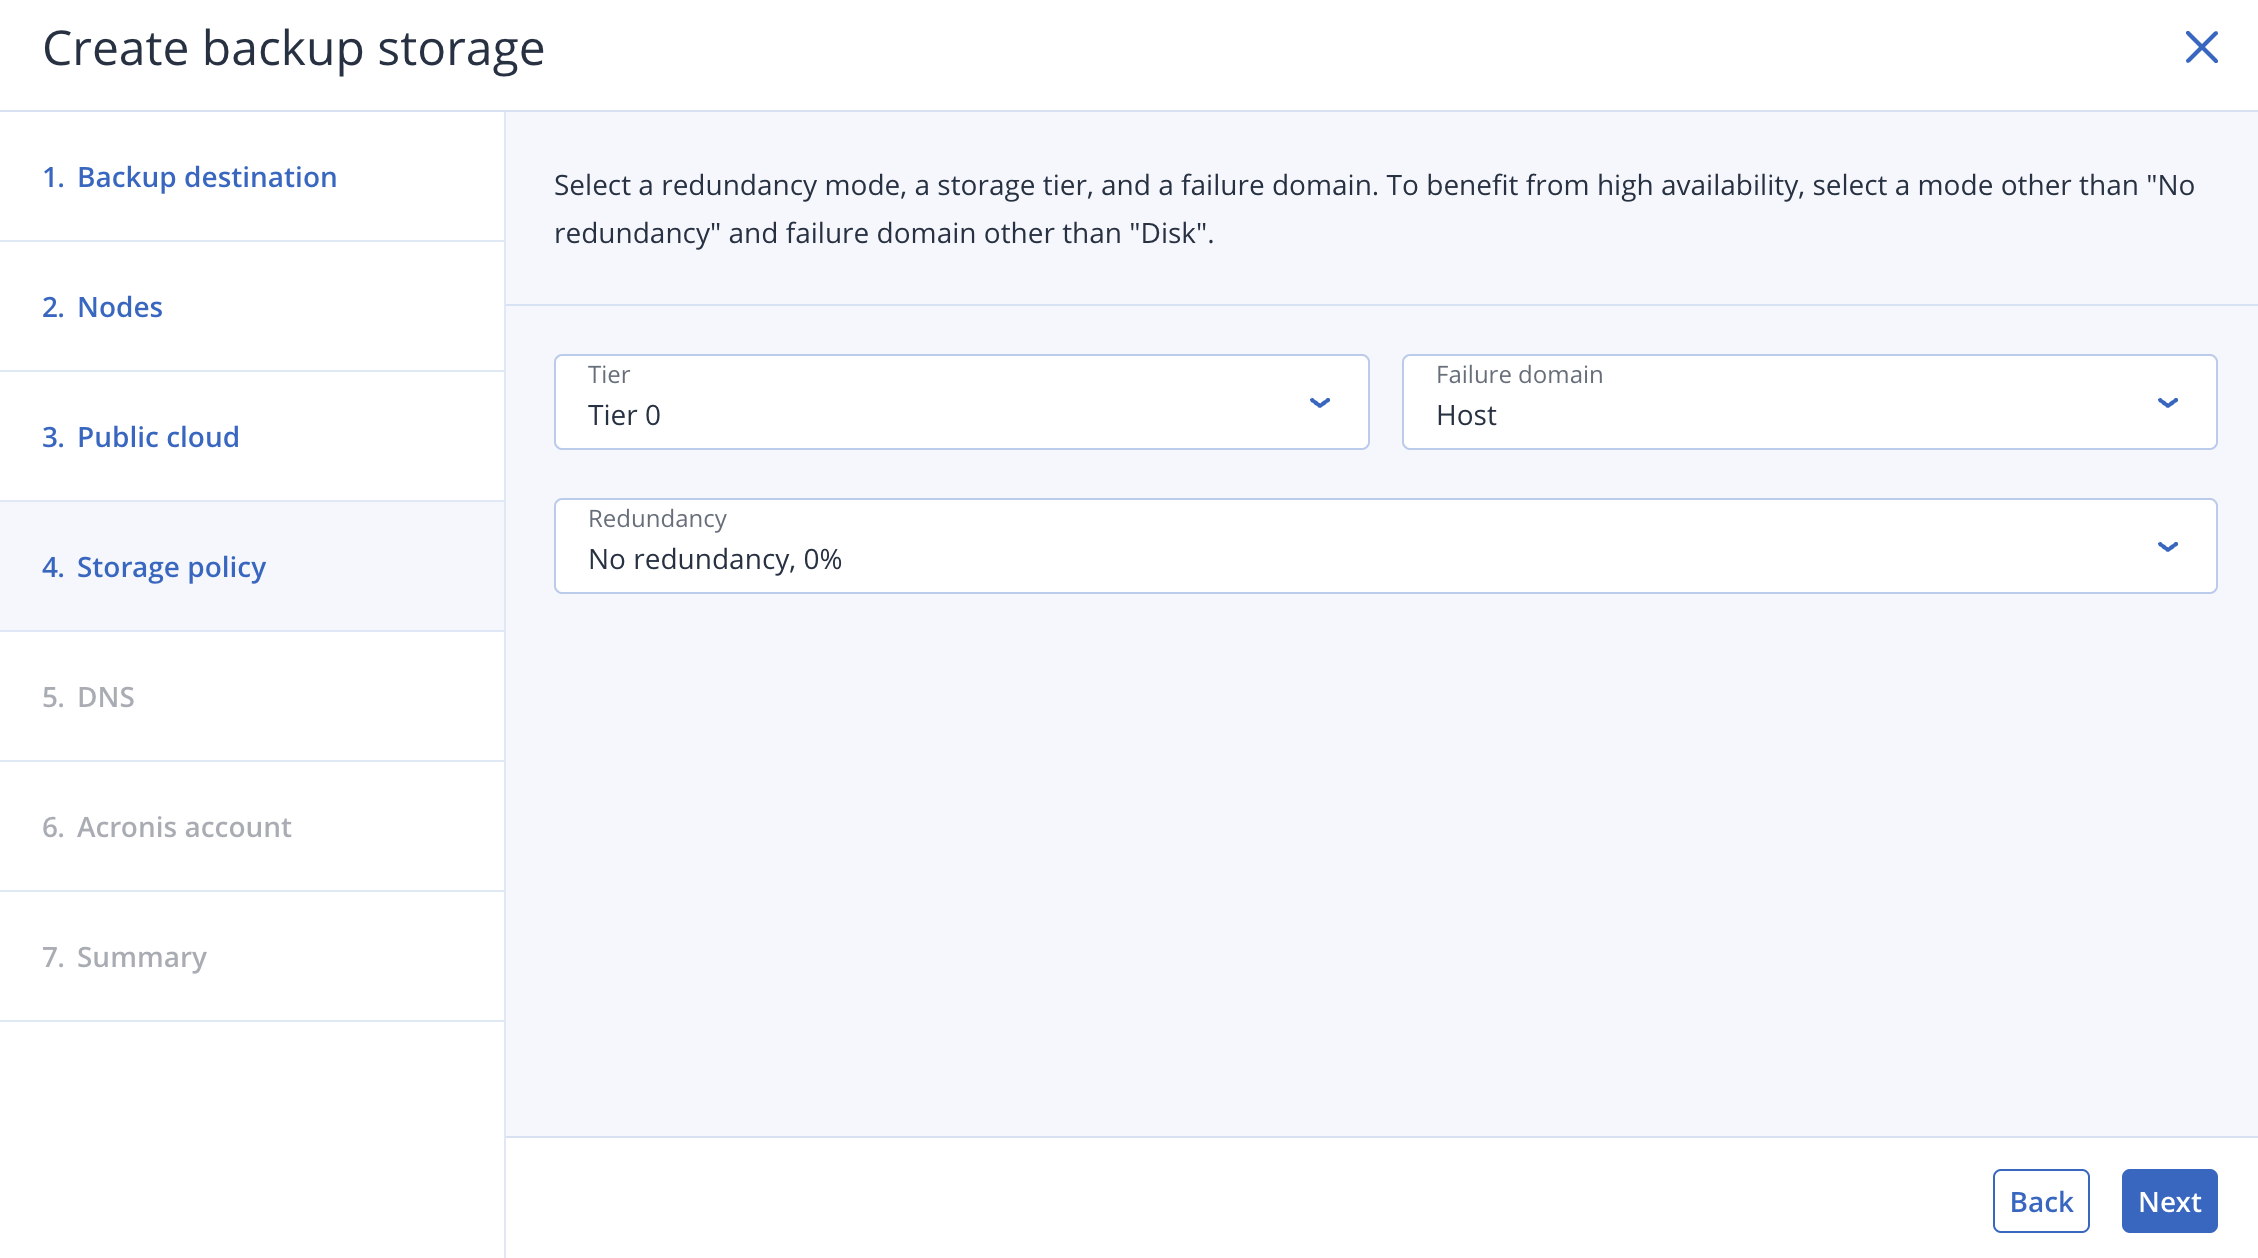
- On Storage policy, leave defaults unless you have specific redundancy requirements.
- On DNS configuration, add the domain name you want to use for the gateway (e.g.,
backup.example.com) and make sure it has a DNS record pointing to the gateway IP address.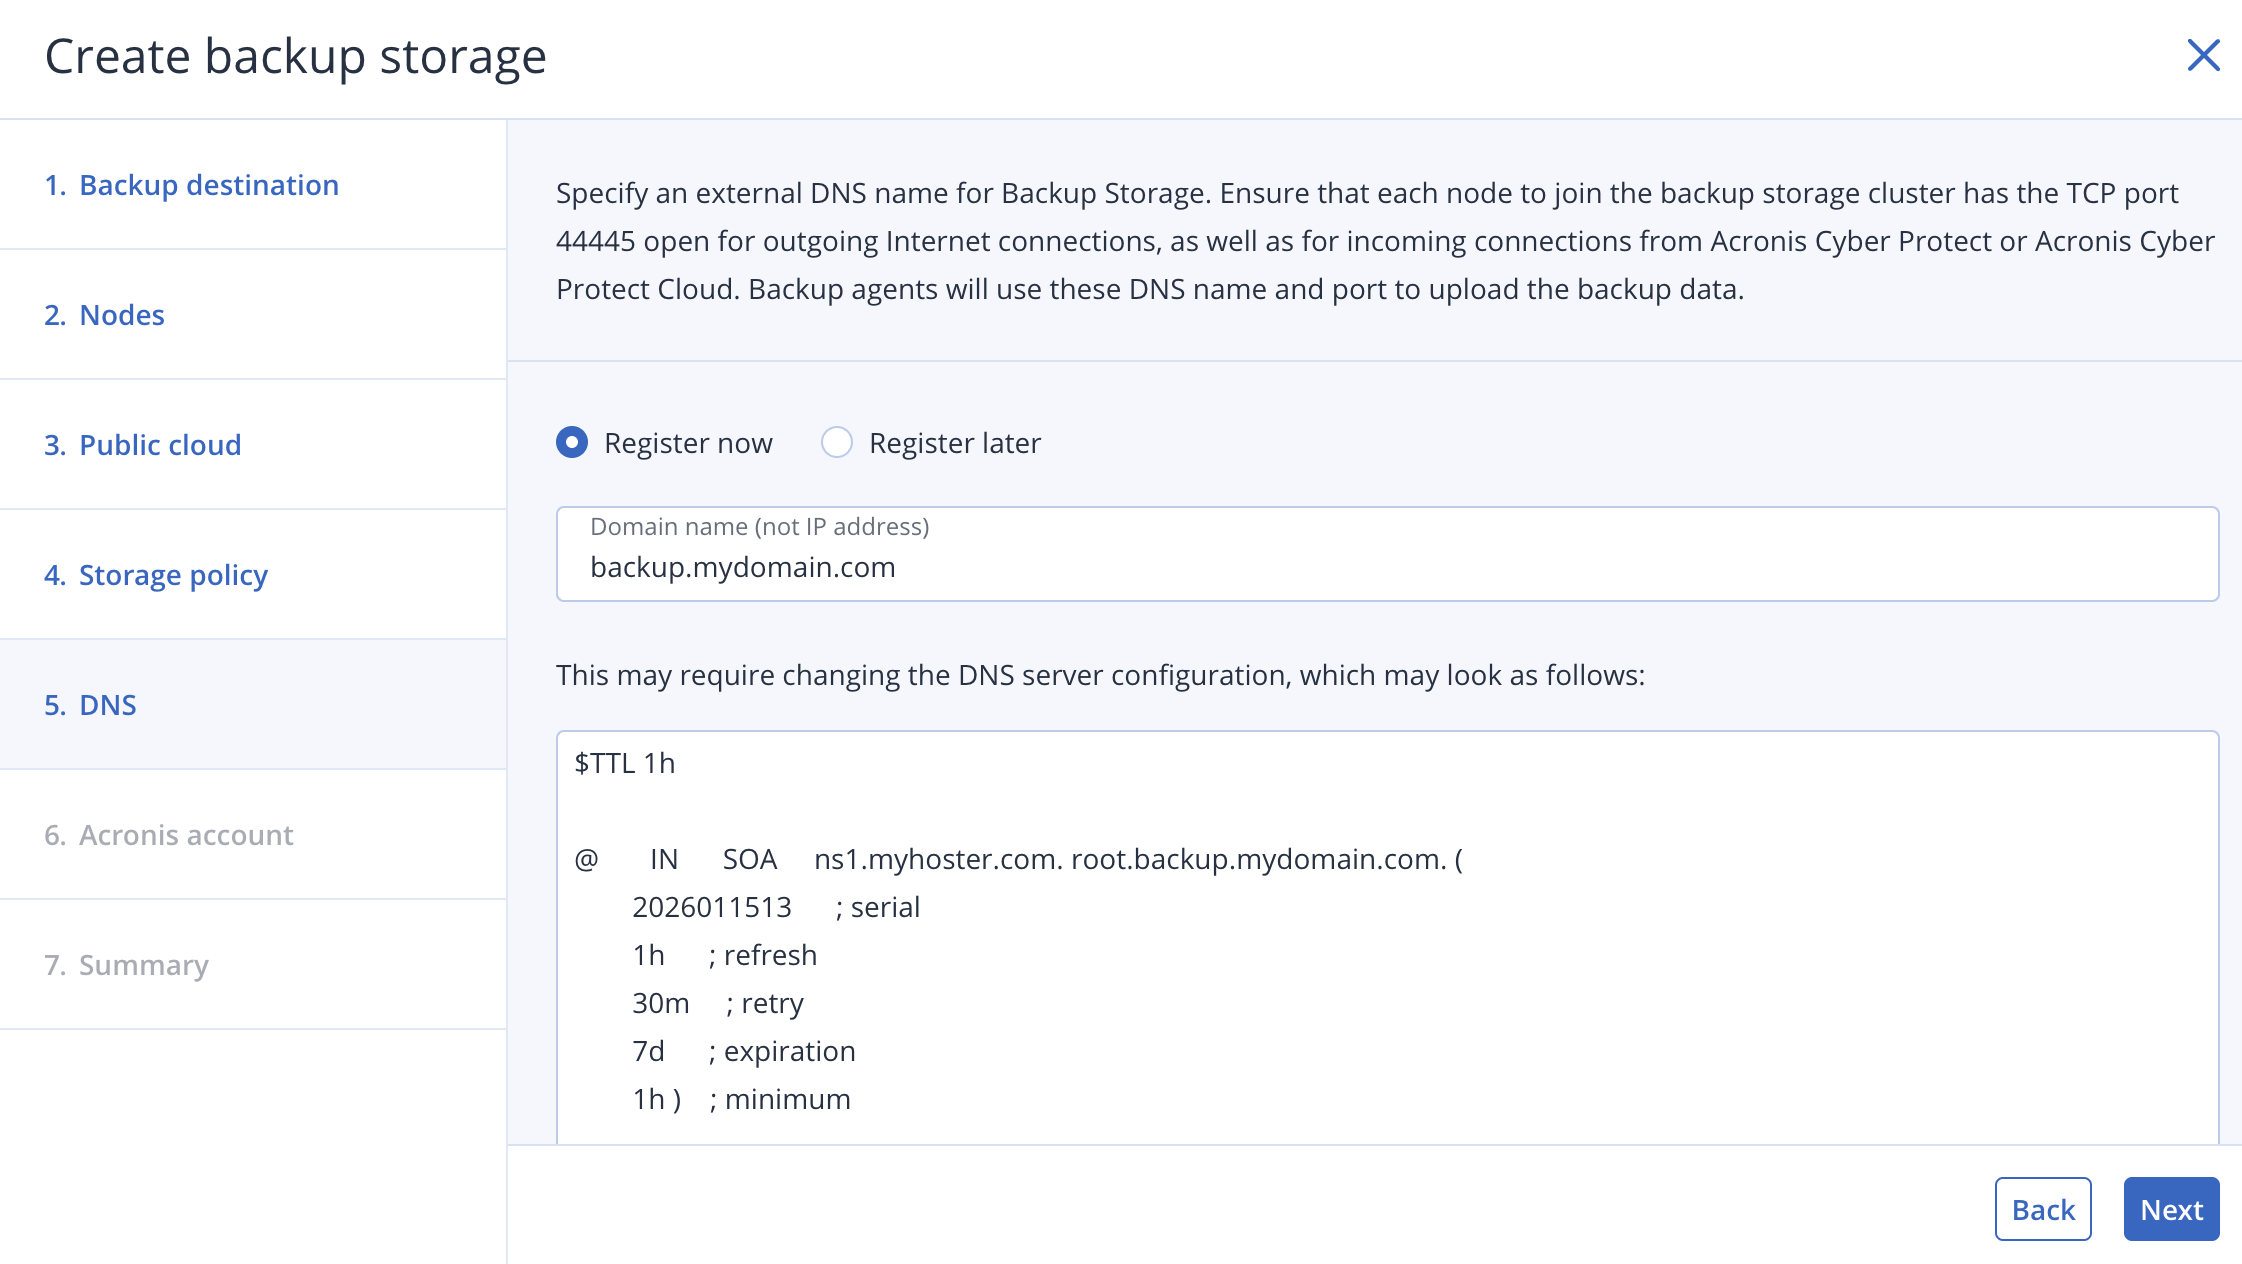
- On Acronis account, enter the URL of the cloud management portal (e.g.,
https://cloud.acronis.com), or the hostname/IP address and port of the local management server (e.g.,http://192.168.1.2:9877) along with your credentials.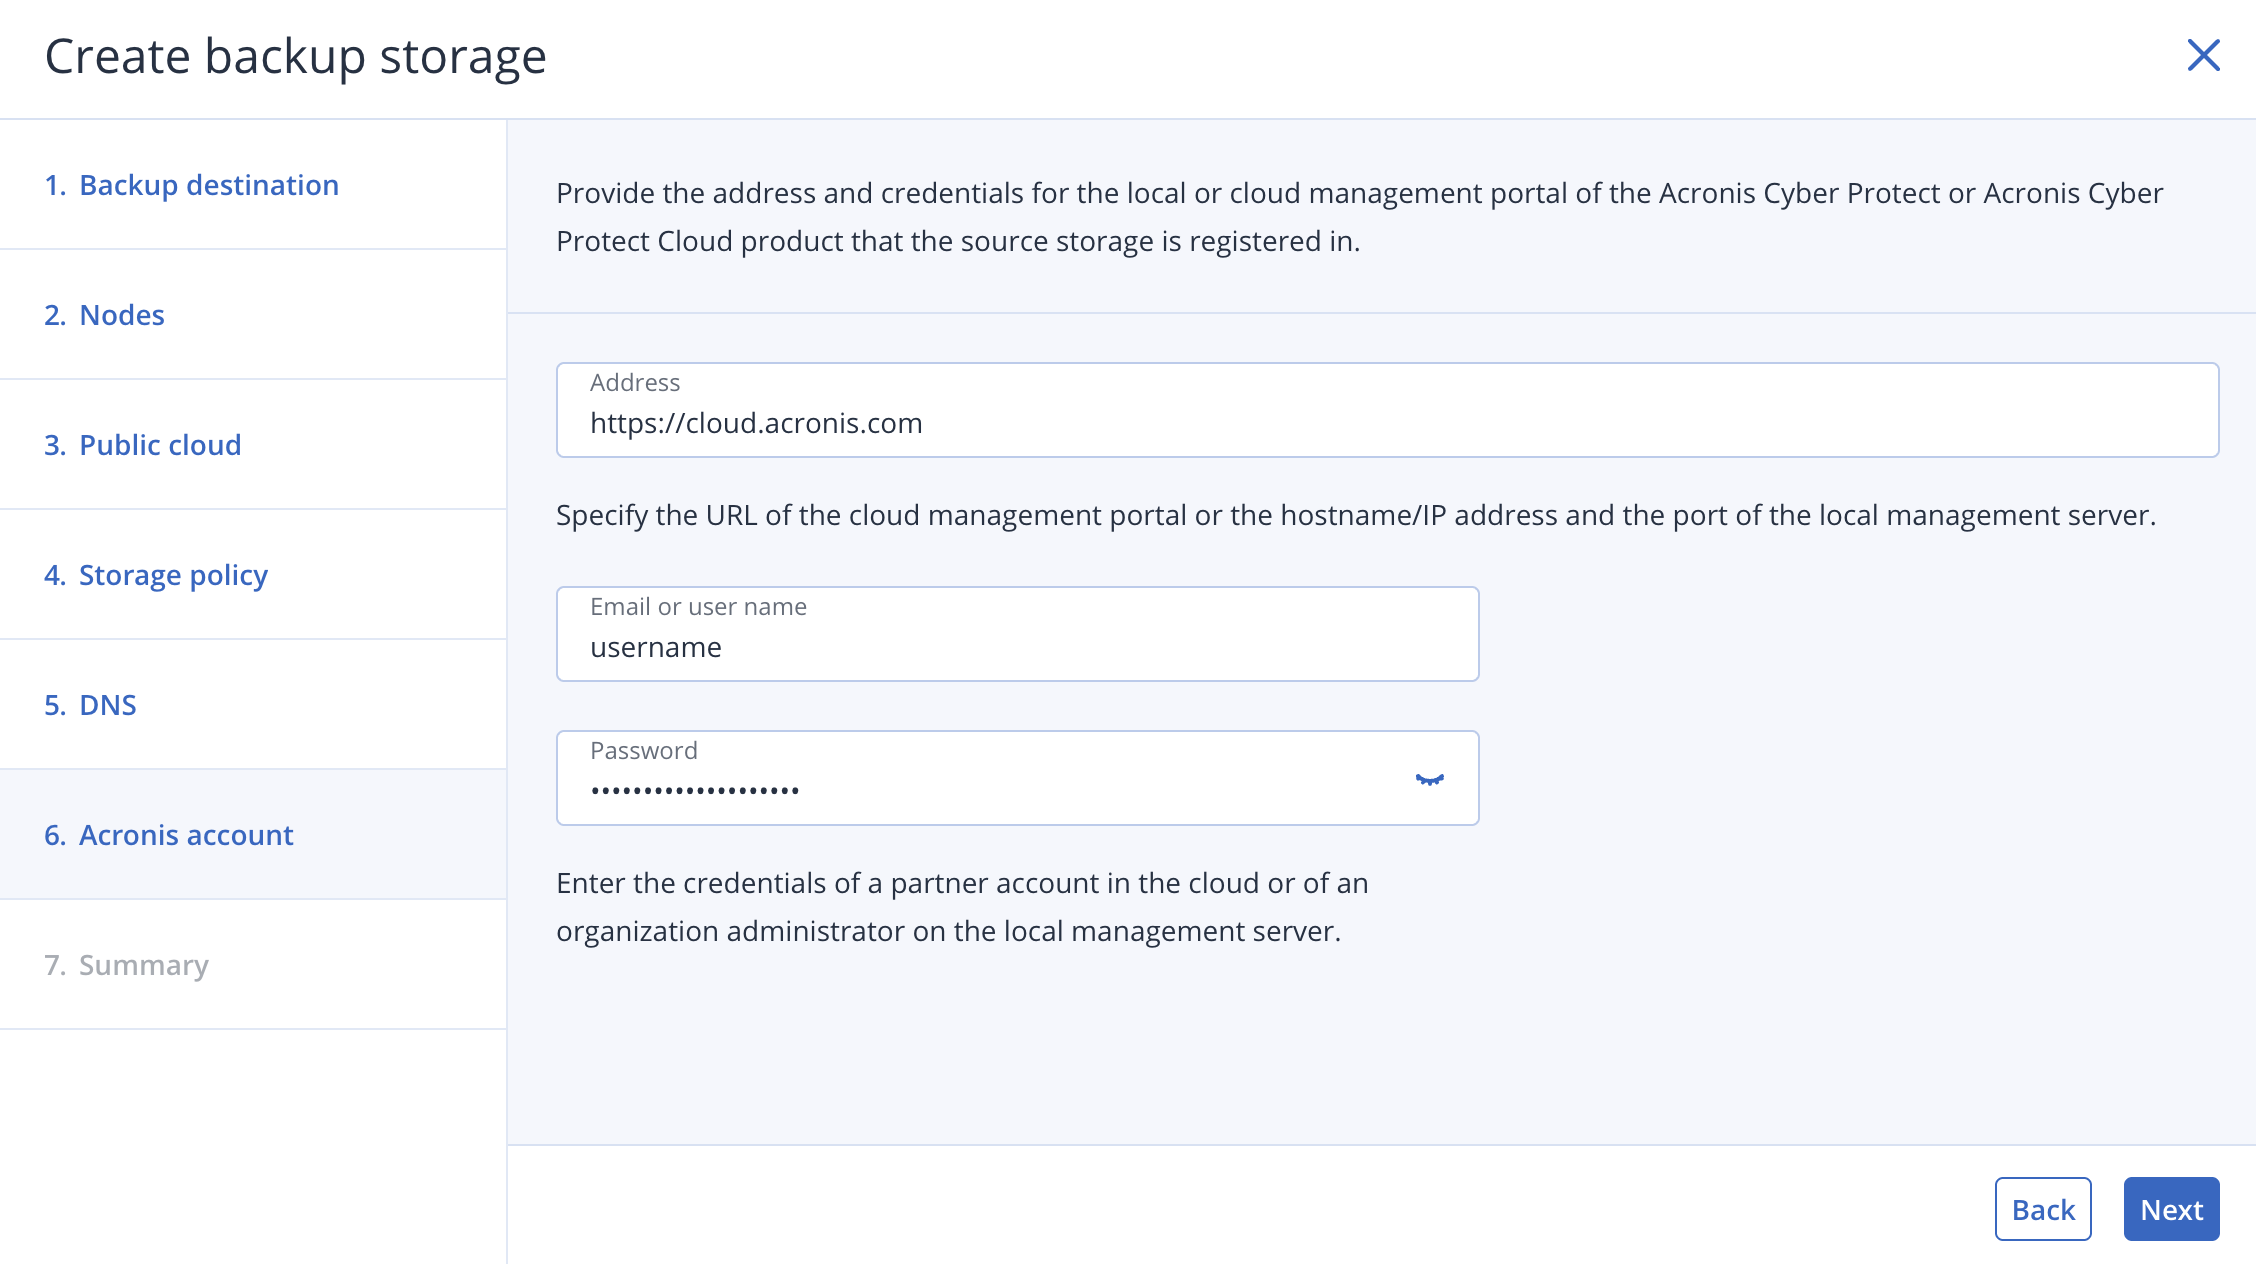
- Review the configuration and click Create to finalize the gateway setup.